3.27.2010

How to number comments in Blogger

Do you want numbered comments in Blogger?

This comes in particularly useful if you have a giveaway site and use Random.org to select your winners, because counting the comments by hand can be a real chore. For instance, my recent giveaway of a Mini Mei Tai? Getting to comment #72 was a breeze with pre-numbered comments.

It also helps you if you'd like to reference a comment by number rather than through some complicated description — e.g., "the third comment by one of the people named Jane" or "the comment that posted at 9:32 a.m." Instead you can just say, "comment 23."

Well, this is going to be my easiest tutorial to write, because I'm just going to refer you over to my savior in this instance:
Go forth, paste the new code into your template at (one of the) required spot(s) and see if your comments end up numbered for ya! You can see she keeps updating her post with tips gleaned from the comments, so if you can't get it to work — or if you can, but in a different way — let Susie know in a comment on her post. You can also scan the recent comments for anyone who's solved a similar problem to yours. (For instance, I agree with comment #60 — see how easy this is! — that you can put your comments back to pop-up afterwards.)

All I can say is: Blogger made this whole thing right complicated for us simple folk. But if you really, really try (multiple options if necessary), you can get your comments numbered. I found the pasting location that worked for me, though I still can't get the over-200-comments issue to resolve itself. Oh, well, something to work on when that matters to me!

While you're over at The Computery, check out all the great blogging tutorials there! And note that Susie has other websites, too, where she posts links to things like how to make a handbag out of an old book. (Because how cool is that?!)

3.25.2010

Create a Facebook landing page for new fans

I was wondering how companies and blogs had sweet landing pages, and now I know!

If you don't know what a Facebook landing page is — and you have a blog or website or product or company or whatever you're promoting with a Facebook fan page — then you need to find out and get yourself one!

It's an html page that shows up whenever a potential fan clicks on your Facebook page link.

It's a way to give a quick snapshot of who you are and what you do, or to showcase a special deal or current offer.
  • If you're an author, you could put up an image of your latest book cover and invite people to click through and buy, or sign up for your blog.
  • If you're a blogger, you could tell potential fans what you like to write about and how they can get in touch.
  • If you're a store, you could highlight a current coupon code or the season's new line.
  • If you're a business, you could put up your mission statement and contact information.

Want to see some landing pages in action?


Love love love the Grumbles & Grunts one (of the Grumbles & Grunts blog), and that's what first inspired me to find out what a landing page was and how I could get me some of that action!


I want mine to look pretty like that sometime.

Other examples:


If anyone can come up with some more natural parenting-friendly examples, please leave the link. I seriously had so much trouble finding anyone I know who has a landing page, so I'm glad I'm getting the word out! :)

How to make a landing page


I don't want to reinvent the wheel. Do what I did — follow this Mashable tutorial:

HOW TO: Build a Facebook Landing Page for Your Business


Easy as pie. The how-to is 4 steps long, and it was very clear-cut.

Testing your landing page


If you're anything like me and you try to preview the functionality of a visitor clicking on your link and finding the landing page — you will be disappointed. I say this because I assume you are your own fan? (If not, why not?)

Once you're a fan, you will no longer see the landing page as the default view when coming upon a Facebook page. It will instead default to the Wall tab. If you couldn't see some of the examples I put in the example list, for instance, it's probably because you're a fan of those sites.

But you can still check the html by clicking on the tab at the top of your fan page. You can also log out of Facebook and then surf to your Facebook page to make sure the landing page is what shows as the default view for non-fans.

Wanna see my landing page?


I don't yet have a public LaurenWayne.com Facebook page because it just now occurred to me to make one.

But here's my current Hobo Mama landing page.


I'd like to make it more sophisticated at some point, but it will do for now, to give visitors a quick intro to my blogs and all the ways to connect with me!

[ETA: All right, I made a Lauren Wayne Facebook page but it doesn't have a landing page yet... Feel free to fan me, and you can see any updates in the future!]

Share your landing pages in the comments. I'd love to make new Facebook friends.

3.24.2010

Just keep writing, writing, writing

I'm with Dori on this one. The most important rule of writing, particularly something massive like a novel? You've gotta just keep going.


I've been remiss at keeping up with my novels of late, because I've been expending my creative energy blogging (and parenting). When I opened up my files to get back to work, I winced at how long it had been since the date of my last save.

Sometimes you need a little space to breathe between drafts, but here's the problem with taking too much time off:

It's so, so, very hard to get started up again.


You think about your novel, but you don't quite remember where you were. You know you had some ideas in mind for edits, but what were they again? You kick yourself for not making better notes, but at the time they were so fresh in your head, they didn't seem necessary. Now, though — ugh, to read through it all again, to try to remember what you wanted to remember. Such a chore, such a dragging waste of time.

Maybe you'll just put it off for another day or two...

Here's a kick in the pants for you, if you're anything like me and need one: Get your manuscript out. Start somewhere. Whether it's finishing or editing or writing the first page, start again. And then keep at it.

Repeat as necessary.

For more inspiration on the topic, check out Jerry Seinfeld's advice: Don't break the chain!

How many unfinished writing projects are you sitting on? What motivates you to get back to work? What motivates you to keep working, day by day?

3.23.2010

Leaving your laptop in a coffee shop

laptop lockI keep having this little problem whenever I decide to write at a coffee shop. See, the rent you pay for your table is in liquid goods, often caffeinated. At some point during my stay, I need to take a trip to the ladies' room.

But what to do with my laptop in the meantime?

I'm not the only one with this problem. Check out this article from Alt Text on Wired:

Workin' at the Internet Cafe: Laptop Dilemma, by Lore Sjöberg


Sjöberg gives eight hilariously worded options. Click over to see. Option 1 is to leave it, which has always seemed foolhardy to me. Every once in awhile, someone will ask me to provide them with Solution 2, which is to ask a stranger to keep an eye on it. (Apparently, I look innocuous and/or trustworthy.) I try to fulfill my duties seriously, but I don't necessarily want to impose on someone in return.

I totally agree with Sjöberg that just bringing the open laptop into the bathroom raises questions, but darned if I don't do that sometimes. Because, see, logging into the internet access takes so long. It's like, what, a whole screen you have to load? Maybe 20 seconds? I don't have that kind of time to waste, people! So I keep my laptop open and bring it in with me. Into the bathroom. And take my time. Hmmm...

He also suggests the possibility of buying some sort of laptop lock, but while leaving my laptop unobserved seems too trusting, buying a heavy-duty chain seems too cynical.

I usually do Solution 7, which is to pack up and bring everything with me. I try to hold it till the very end!

His commenters have some good alternate solutions, including French kissing the laptop or leaving it open to blistering nastiness. I like the woman (and, see, I think there might be a man/woman difference here in how comfortable we feel leaving our keys and wallet as well at the table — from a self-defense standpoint, I do gather everything onto my person) who suggests bringing extra materials to mark her spot, such as sweaty gym clothes. Must remember that next time so I still have a seat when I bring all my valuable belongings into the restroom.

(I don't know why I feel the need to justify my choice to write in a coffee shop, but several of the commenters on the Wired article suggested just staying home. I use a coffee shop when I've dropped my son off at school and need a convenient place to walk to nearby that has an outlet and wi-fi before it's time to pick him up again. If you have a different reason, though, I'm cool with that, too. I'm really enjoying the coffee shop/laptop culture, to be honest!)

What are your laptop-in-a-coffee-shop solutions?

3.22.2010

Use image alt and title tags to drive traffic to your webpage or blog

I was checking out my Google Analytics tonight, which I actually don't do that often, since it somehow got marooned on another account.

I've noticed something the last few times I've visited: Go under Traffic Sources --> Referring Sites. Consistently in my #1 spot?

Google Image Search, http://images.google.com


You know what this means? It means I'm doing something right (yea!).

The information in my images is driving traffic to my blog. If Google Image Search isn't high on your list of referring sites, make sure you're doing what you can to attract new readers or customers to your website — all through the power of your pretty, pretty pictures.

Fill in the alt tags on your images

When you have an image on a post or on a webpage, the source code looks something like this:

<img src="http://images.hobomama.com/20100122_1475.jpg" align="right" alt="Hobo Baby with train conductor's hat and harmonica" title="Hobo Mama" width="200" />

You can see that I've included an alt tag that amply describes the picture. Do you want to make sure that's true? Here's the photo for your viewing pleasure:

Hobo Baby with train conductor's hat and harmonicaNow, granted, this might not be the best photo to draw traffic to my site, since I'm likely to pick up people searching for hobo babies, harmonicas, or conductor's hats — none of which my blogs are actually about.

But I have gotten consistent results from people searching for other common keywords that show up all the time in my Hobo Mama blog and related images: breastfeeding, elimination communication, toddler, baby, pregnancy, birth, babywearing, baby signing, Mayim Bialik (what? people don't routinely search your blog for news of Blossom?), and so on. And all of those keywords I do write on regularly, so it's a beneficial stream of traffic for me — the type of traffic that's likely to stick around.

For instance, take a gander at this Google Image Search for "elimination communication toddler":

Google Image Search for elimination communication toddler

Those top four photos are all me, baby. I mean, not of me, obviously, or even by me — but hosted on my site. And since that's a niche interest, it's likely that only people genuinely interested in the topic will be searching for such pictures and will therefore want to click through.

If they do, my lovely blog posts on the subject will greet them:

Google Image Search click through to Hobo Mama on EC toddler

Take-home message? 

If you have an author website, make sure you tag your book cover images with an alt that includes both the title of the book and your name as the author, something like "My Wonderful Book by Author McWriteypants." This works well for Amazon Associates links as well. If you're using the Blogger plug-in, those alt tags are automatically filled in for you now (snap!). If it's an author photo, don't make the alt tag "author photo" — make it "Author McWriteypants author photo." Then you'll get anyone searching for author photos in general, and for yours in particular.

If you have a blog, do as I do and make sure every picture includes some keywords that describe the picture and reference back to your writing topics. Don't fill the alt tags with unnecessary gobbledygook, because it will mark you down as a spammer, but do use them to their fullest reasonable limits. It's an extra step, but it's worth it. If you use Photobucket to host your photos and you fill in the Title box, Photobucket will fill in the alt tag for you in the version of the code labeled "HTML Code," so you can save some time there since you were probably going to title your images in Photobucket anyway.

What about title tags?

From the research I've done, alt tags are definitely more important in search engine ranking, so prioritize alt tags if you're going to slack off on one or the other.

Title tags are intended for an image that is linking to something else. Note that I put the title "Hobo Mama" in my img code. Hover over the picture of my hobo baby and see how the title shows up in a little box where your mouse is. A title basically is to tell you what the image is linking to.

The title can be fancier than the webpage name. You could put "Click here for more scintillating blogging about hobo babies and their instruments," for instance.

Change the file name and other attributes, too

There's some evidence that Google also indexes the file name of the image. So, an image file name of "hobo-baby.jpg" would be better than my crappy actual one of "20100122_1475.jpg."

Note the hyphens in "hobo-baby.jpg." The keywords are read as separate words if there are dividers such as hyphens or underscores between them.

Other tips?

Put in width and height identifiers, to make indexing easier on Google and big, juicy images more readily accessible.

Consider a watermark to alert image surfers to your site and discourage image thieves. You can also put image copyright information into the alt or filename text.

In conclusion, my lovely image gifters

Use the alt tag every time you want your image to be searchable (and don't if you don't, such as if you'd prefer to keep it more or less private).

The alt tag should describe the image. In fact, people with visual impairments will use the alt tags (read aloud by the computer) to see the image, so imagine that you're describing the image to someone who can't see it and make that your alt tag.

Use the title tag if you want to and if your image is linking to something else. Make the title tag descriptive of the link (e.g., "See picture at high resolution" or "Subscribe to Hobo Baby Harmonica Digest" or whatever is the case).

Change your file names to something descriptive if you remember before you go through all that bother of uploading. (Sigh.)

Remember that the surrounding text also influences how well Google ranks your images, so just keep being reasonable (using images that fit the theme of your site's content), and this synergy will happen on its own.

The result? Happy readers who can get useful information from your functional images — and happy search engines, who have new material to mine — and happy you, who gathers new readers as they float in from Google Image Search on your most common keywords.

How has Google Image Search helped attract readers to your blog, and have they been the good, stick-around kind? How faithful are you at putting alt tags in place?

3.21.2010

How to edit HTML in Blogger

Dionna of Code Name: Mama and I are writing a few blogging tutorials of particular use for our Carnival of Natural Parenting participants. This one will help in pasting the Carnival code blurbs!

Here's a little tutorial on how to edit HTML in Blogger when you're creating or editing a post. This is useful if you want to:

  • add HTML code to a post,
  • edit specific HTML code,
  • or copy your post's HTML to use elsewhere.


If you're used to creating your posts in the Compose mode in Blogger, you're used to a WYSIWYG (what you see is what you get) experience, and you don't need to know HTML — Blogger automatically codes everything for you.

But it's easy to switch to HTML view if you need to.

(Click on the images to see them larger.)


Check the tabs at the top of your post box. If you're in Compose mode (you can tell if it's in the darker tan and not underlined), whatever you type will be formatted as if you're typing into a word processor. You can add formatting like bold and italic, insert images and videos, format alignments and lists, and perform tasks like spell check.

But if you need to see or edit the HTML, click on the underlined "Edit HTML" to switch tabs.


In Edit HTML mode, you can view the HTML code. If you know how to edit HTML, go for it! If you don't but have an HTML blurb you want to paste in, just search for the location you want it to go and paste it in. To make sure it all looks the way you want, either switch back to Compose mode or click on Preview.


Preview will give you a glimpse of what the code will look like in the finished post.

You can see it looks basically the same as in Compose mode. If you have a standard template, though, Preview is actually more helpful than Compose for getting a sense of what your post will look like, because the box will be constrained to your template's width and it will use your template's default font. That way it's easier to make sure images are where you want them, for instance. You can click Preview from either Edit HTML or Compose.

Hope that helps! Leave a comment if you have any further questions and I'll try to make things clearer.

For more information, check out Blogger Help's overview of the post editor.

3.18.2010

How to make your blog into a book

I'm writing a post at HoboMama.com about using this year's CreateSpace coupon for a free proof copy of a print-on-demand book, due to my NaNoWriMo win.

I say in that post that what I don't think would be feasible, in my case, is simply to reprint Hobo Mama as is and have it make a decent book. It's just ... too bloggy.

But some of you out there might have the perfect blogs to self-publish.


Maybe you run a recipe blog, a photo blog, an essay blog, etc., with a strongly unified theme and timeless content.

Or maybe you have relatives or friends who don't (won't, can't) get online but would read a bound copy of your blog.

Or maybe you want a copy for posterity, such as if your blog records your baby's first year.

Or maybe you just want to see yourself in (hard-copy) print!

Whatever your reasons, there are several possibilities for publishing a copy of your blog into an ebook or print book.

Scary Mommy gives you an idea of what such a book might look like. (Answer: Fabulous!)

Print directly from your blog
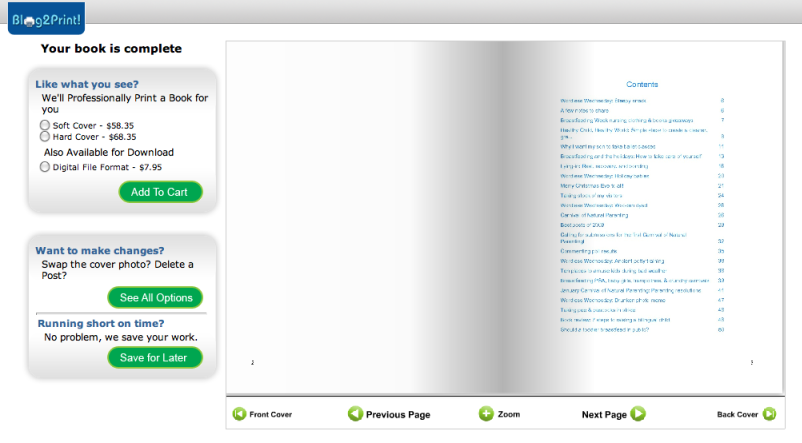
Blog2Print


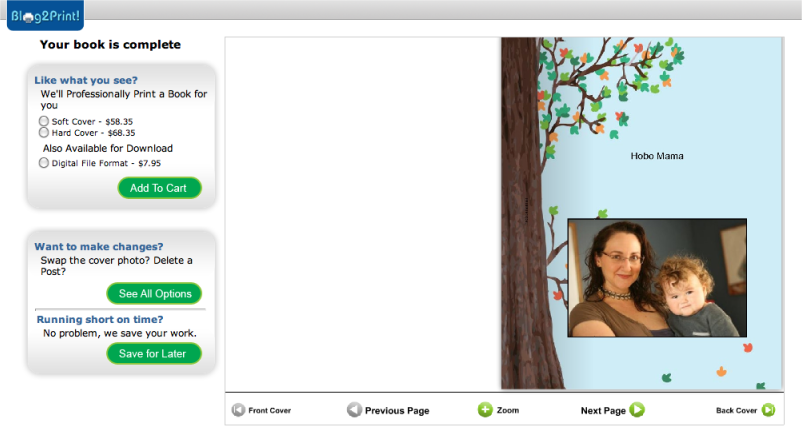
I first had my eye caught by an ad on Blogger for 
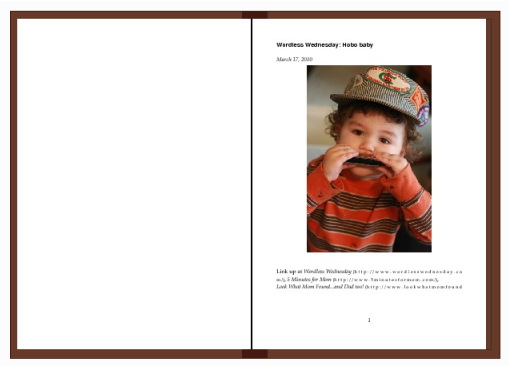
Blog2Print, which is compatible with Blogger, Wordpress, and Typepad. Prices start at $14.95 for a 20-page softcover, or $7.95 for a PDF ebook. (Note that 20 pages is not very many! When I selected a 3-month range, it came in at 142 pages without comments and my quote was $58.35 for softcover and $68.35 for hardcover. Apparently I am very wordy.)

You choose what date range of posts to include and whether to include comments. If you at all anticipate including (any) comments, I would suggest choosing to include them at first. Once you register for an account (free), you can go through each individual post and select which comments you don't want included.

Once you have an account, you can also swap out images both on the covers and in individual posts, and  you can choose what posts to include or discard. This would come in especially handy if you want to collect only posts on a specific topic (say, all your craft tutorials) for a theme book.


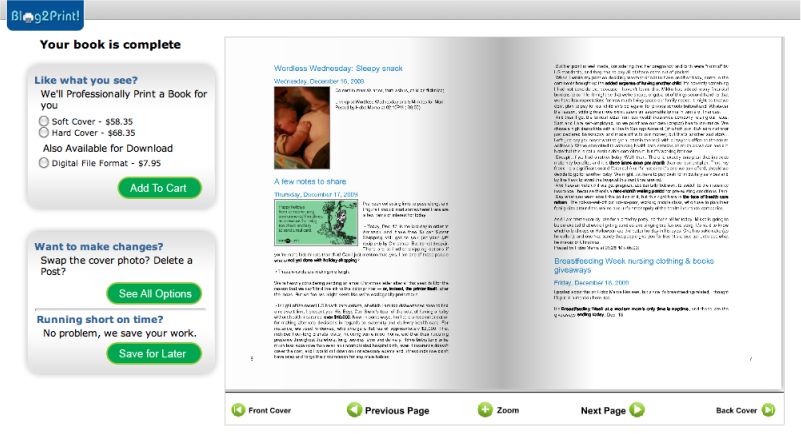
You can also add in your own custom pages, placing photos or text or a combination of the two.

A table of contents is automatically designed for you from your post titles, which is convenient.


There are a small selection of cover designs available you can choose from. I wish there were a feature to design your own cover, because I feel like there isn't a very broad selection of professional and elegant covers available. You can choose what photos go on the front and back covers. You also get to edit a dedication. Now's your chance to thank your producer!


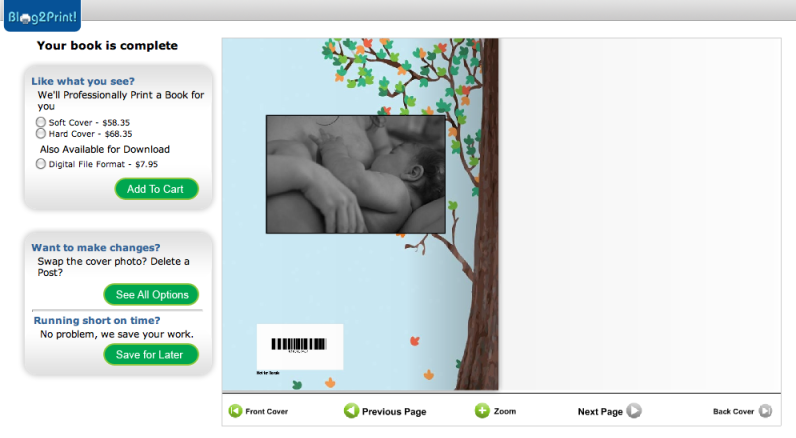
Blog2Print also seems to be adding a separate page for copyright/advertising purposes.

I can't vouch for the print quality or turnaround time. Anyone with experience, feel free to chime in!


Blurb

Blurb is what Scary Mommy used for her book. It has since been opened up to all typical blogging platforms: Blogger, LiveJournal, TypePad, and WordPress. It looks like you can "slurp" your blog's photos and posts directly into a layout.

There are a lot more customizations available with Blurb. For instance, you can choose which size book you want, and the prices look reasonable. You can also choose to have a dust jacket for a hardcover, and you can upgrade to premium interior paper.

You have to download the Booksmart software to import your blog to make a book, so I haven't tried that yet (considering I'm not actually going to be using it and all ...). The software is compatible for PC and Mac.

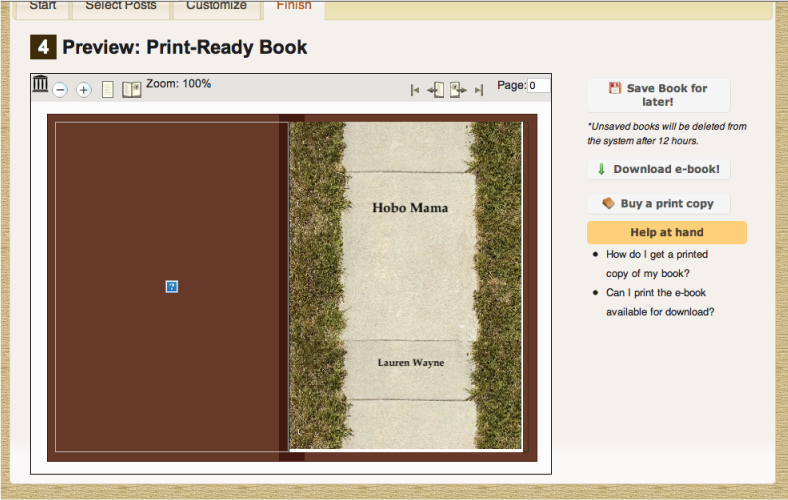
Read reviews to see what users think of the print quality. At any rate, I like how sophisticated the sample books look:


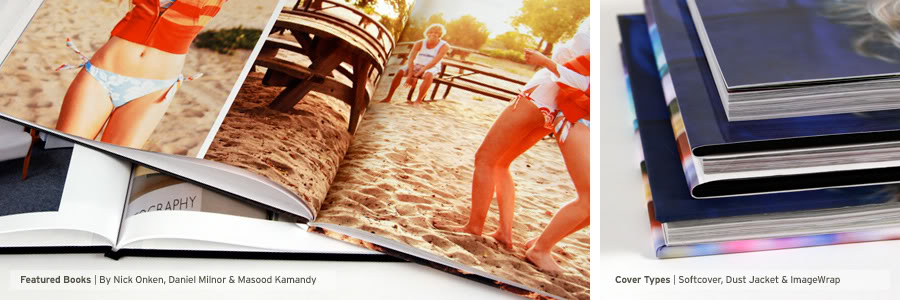
And this is really random, but I know Nick Onken, whose photos I believe those are. And I'm inclined to think that if he's satisfied with Blurb that it must be pretty spiffy.


FastPencil

Matt Cutts reviewed a few blog-to-book options and had the most success with Fast Pencil. (Scroll down that page to see "Turn Your Blog into a Book (Blog-to-book import).")

Matt recommends uploading several smaller chunks of your book, since otherwise it will be too large for FastPencil to import.

Matt says that images imported but not all html coding, and not embedded items such as polls and videos. There will still be editing to do, then, after you've imported, unless your blog is super simple.

Says Matt Cutts:
But all in all, I was impressed with FastPencil. They also have nice collaboration tools (e.g. you can designate editors, reviewers, co-authors, and project managers to help in writing/polishing the content). The site also works through your web browser instead of as a downloadable program, which appealed to me.


Print from a PDF of your blog

The other option for printing your blog requires an extra step or two but enables you to use pretty much any print-on-demand publisher (including CreateSpace, Lulu, CafePress, etc.). You use a service (or your own tech know-how) to convert your blog into a PDF, and then you use that PDF to publish your book.

Your blog is stored and can be exported as an XML file. What is an XML file? I have no earthly idea.

But here's how to export your XML file in Blogger, and here's how in WordPress. Here's a tutorial for LiveJournal, but ignore the steps that import it into Blogger.

It's that XML file that needs to be converted to a PDF, and there are several possibilities of XML-to-PDF converters out there, though I frankly wish there even more.

BlogBooker

(for Blogger and WordPress) — I couldn't get this to work for me, possibly because I asked for too many posts at once. Unfortunately, there's no way in Blogger to specify a date range for exporting. All I can think would be to edit the XML file directly and cut it down into chunks. When I tried to upload my whole blog, BlogBooker told me my XML file had errors but not what those errors were. When I tried to follow the directions in the FAQ, well, I still don't see any errors. Not that I'd know what to look for in the first place!

LJBook

(for LiveJournal) — same company as above, but for LiveJournal

Blog2Book

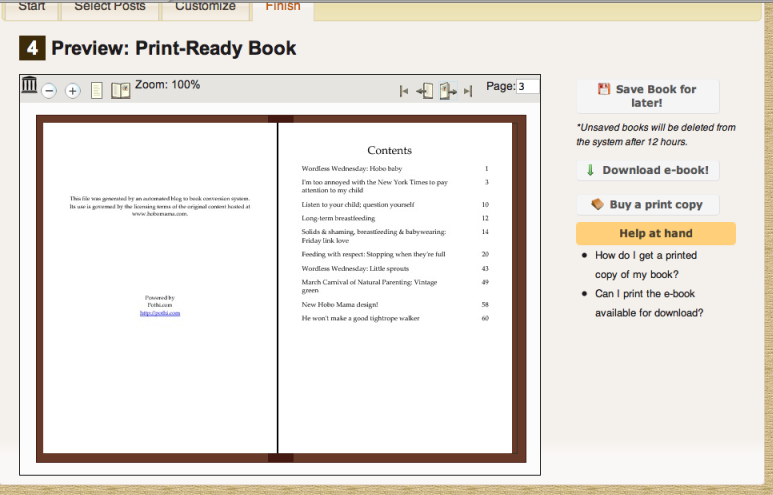
(for Blogger and WordPress) — PDF failed when I tried to do too many posts at once. Notice a pattern here? But if it works (and it did for me once I selected only my past 10 posts), you can select which posts to include and arrange them in your preferred order if chronological isn't cutting it for you. You can also choose to publish images or not. You can add a preface and dedication and specify an author name and subtitle.

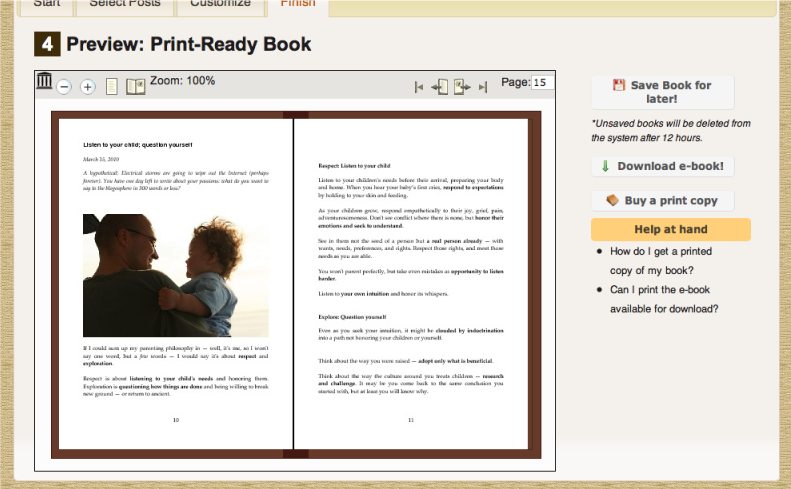
It starts each post on a new page, which can leave some pages looking a little bare with only one or two ending lines:

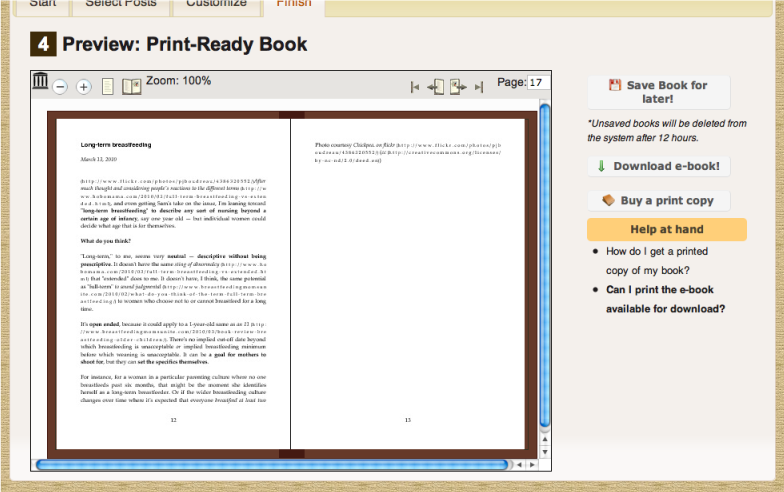
It will transfer a maximum of one (the first) image per post, looks like.

Blog2Book has a tiny selection of cover designs available, so I imagine you'll want to remove the cover entirely and design a new one at the print-on-demand publisher.

Unfortunately, I think you'll need access to PDF editing software to do that, but maybe the POD publisher can help you out.

WPTEX

This is theoretically something WordPress users can use to make a PDF from XML. Don't ask me.

Packt Publishing: Converting XML to PDF

And if you're seriously tech-savvy, code the PDF yourself. I am not that tech-savvy. I don't know why I find it confusing. Here's the layout of the steps involved: "This process will include setting the environment, converting the XML document to XSL-FO, parsing the XML document which further explains generating XSL-FO document, after which we finally move to converting the XSL-FO document to a PDF document." Well, duh, it's all pretty straightforward.

    Once you've successfully made a PDF of your blog, you can print the PDF of your blog at any self-publishing or print-on-demand publisher (or at a traditional publisher, honestly) that will accept a PDF. Options include CreateSpace, Lulu, Blurb, CafePress, and Lightning Source.


    If you know of other options for printing your blog into a book, please let me know. And please leave a comment if you've published your blog as a book and what worked for you!
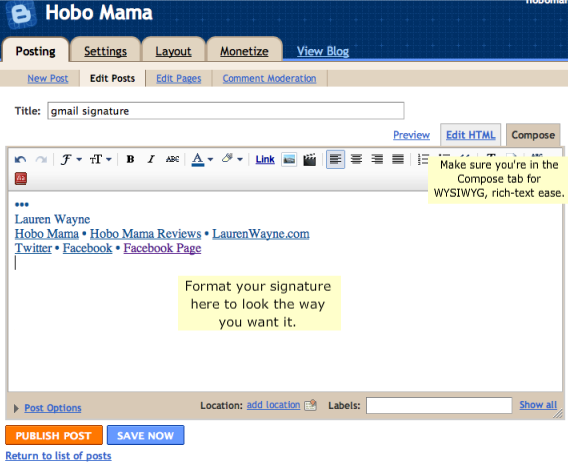
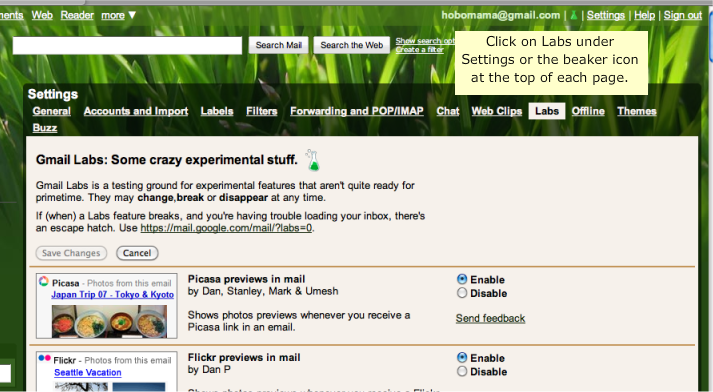
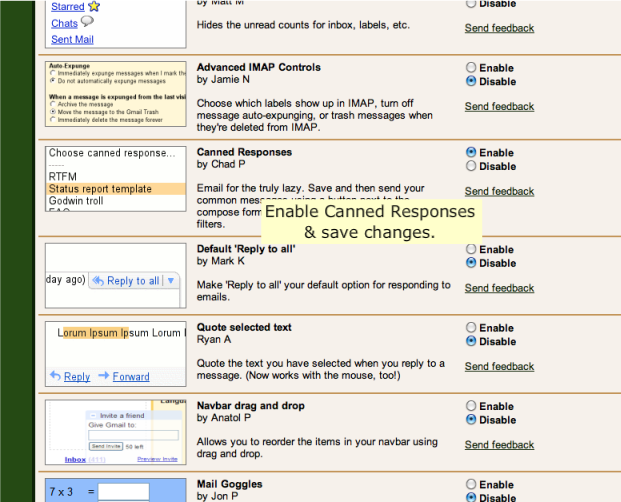
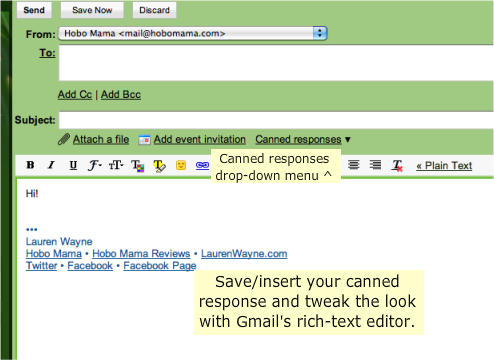
    3.07.2010

    HTML signatures in Gmail: An easy how-to

    Update, September 2010: Gmail has finally unveiled a rich-text signature function that replaces this method, though you can still read on for benefits and tips of creating an email signature.


    I've been wanting an HTML signature in rich text for my Gmail account for when I send business emails, so I can promote my websites, Twitter account, and Facebook pages — but all in a streamlined and attractive manner.

    Gmail doesn't currently support rich text or html formatting in the sig box, which is on the Settings page.

    Here was the best I could do in plain text:
    ~*~
    Lauren Wayne

    www.HoboMama.com
    www.HoboMamaReviews.com
    www.LaurenWayne.com

    www.Twitter.com/Hobo_Mama
    www.Facebook.com/HoboMama
    www.facebook.com/pages/Hobo-Mama/322453825286

    Unwieldy, isn't it?

    I don't like how lengthy the Facebook URLs are, and I don't like that the sig as a whole is a whopping 10 lines long. For Gmail to automatically parse the html, I had to keep at least the "www" part intact, which meant I had to use a plain URL rather than just, say, a blog name (www.HoboMama.com vs. Hobo Mama or HoboMama.com).

    So, since I didn't like that, what did I like? Well, here's what I ended up with, using my super-cool and sneaky method:
    •••
    Lauren Wayne
    Hobo MamaHobo Mama ReviewsLaurenWayne.com
    TwitterFacebookFacebook Page

    And here, my friends, is how I got there:

    First of all, you need a place to edit your html. If you know how to hand-code html and preview it online, go to it. I found the easiest way in a WYSIWYG sort of way was to use a Blogger account. For my purposes, I used my standard Hobo Mama account.

    1. In Blogger/Blogspot, create a new post. You can title it "gmail signature" or something else memorable in case you want to come back to it. You won't be publishing it, just saving it as a draft, and you can always delete it after you're done tweaking your signature if you want to keep your account clean.
    2. Click on the Compose tab. Type in your signature as you want it to look. Use the Link function to add URLs to keywords. Change fonts and colors as you wish. You can add in special characters like bullets. You could even add images, such as a company logo. In fact, you could make your whole signature just one big image if you'd rather and know how to edit image files.
    3. Copy the finished signature.


    (Click on images to see them bigger.)

    All right, now we head over to Gmail. As I said, you can't use any html or rich-text formatting in the signature box, so we'll skip that box. You could simply copy and paste your signature into each email individually, but that's cumbersome. The method I came up with isn't as easy as having a traditional signature, but it takes only a second or two each time you compose an email and it uses the Canned Responses feature in Gmail Labs.

    1. Go to Settings in Gmail (top right corner).
    2. Click Labs along the top tabs.
    3. Scroll down or do a search for Canned Responses and select Enable next to it (yes, "email for the truly lazy"). At the top or bottom of the Labs page, click Save Changes.
    4. Now click on Compose Mail. Make sure you've selected Rich Text as your messaging view. Paste your signature into the message box. It should paste exactly as you had it formatted in the Blogger box. You can change the font or layout further using Gmail's rich-text editing.
    5. As an optional extra, if your signature font is formatted in a way unlike the way you would like your message to be (for instance, my signature is in blue, but I prefer my message font to be in black), add in a simple line of text above your signature that you usually use to start a message. In my case, I added "Hi!" I formatted "Hi!" in my preferred black message font. [ETA: I just realized what would be even easier and more convenient would be to add how you usually CLOSE your emails, such as your name!]
    6. Now that you've enabled Canned Responses, there should be a line that says Canned Responses just above your message box. Click on Canned Responses and select Save --> New canned response... A box will pop up and ask you for a name to save it under; you can choose something like "business signature."
    7. Now you can Discard your draft message.
    8. Next time you go to email someone, either through Compose or Reply, click on Canned Responses --> Insert [business signature or whatever you called it].
    9. Voila! Your signature appears. You can tweak it in the message box if you'd like, or go back to Blogger to do major revamps. If you want to save a change, simply click on Canned Responses --> Save --> [business signature] again, and OK the warning that pops up that you're saving over a saved canned response.


    I know this method isn't quite as convenient as having a signature automatically appear whenever you click Compose, but it's the most streamlined way I could find for now!

    The good news is this method lets you choose which messages you want to put a signature on. You could even have multiple signatures, such as a personal one and a business one, and choose which signature you want each recipient to see. You could put your address and contact info in emails you send to publishers, for instance, but your URLs alone for emails to colleagues, just saving each signature under a different name.

    Hope this tutorial helped you! Let me know, or give me your own tips.
    Related Posts Plugin for WordPress, Blogger...