1.25.2011

Google Reader shared items: Your public feed for reading recommendations

Do you want an easy way to share blog posts and online articles with your friends and readers?

Google Reader has a way to share items and create a public feed with all your reading recommendations.

I first heard about this idea from Paige of Baby Dust Diaries, in a footnote on her Sunday Surf. (If she has an awesome, longer tutorial somewhere I'm missing, she or someone can let me know!)

In this how-to, I'll pass on what I learned from Paige and teach you how to set up your own Shared Items feed in Google Reader, add to it easily from Google Reader, and publish the feed to your blog.

In a future how-to, I'll talk about some further Google Reader goodies, including a way to add items to your shared feed from outside Reader, and even if you're not subscribed to a feed for an article you want to reference. I'll also talk about how to show off a public feed on your blog or other site.

Absolute basics

You need to have a Google Reader account and be subscribed to your favorite blogs. I'm going to skip ahead at this point and assume you've got that part figured out, but if you need help, let me know and I can do a separate tutorial!

Add to your shared items

(Click on any image to see it larger.)

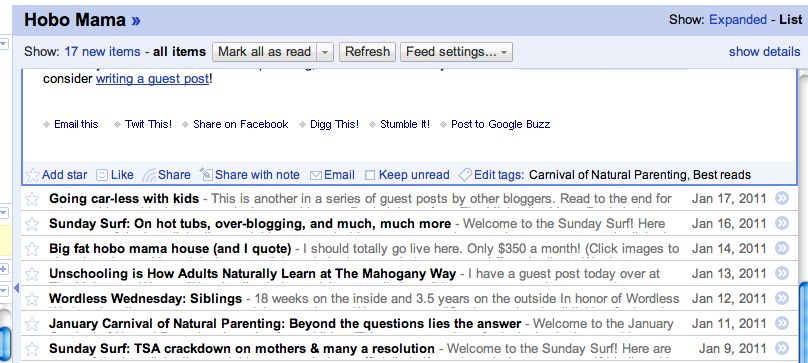
Whenever you open an article in Google Reader and scroll to the end, you'll see these options. The two relevant ones are "Share" and "Share with note."

To add an article to your shared items, simply click on either share option.

"Share" will add it automatically to your shared items. The little feed icon will turn orange.

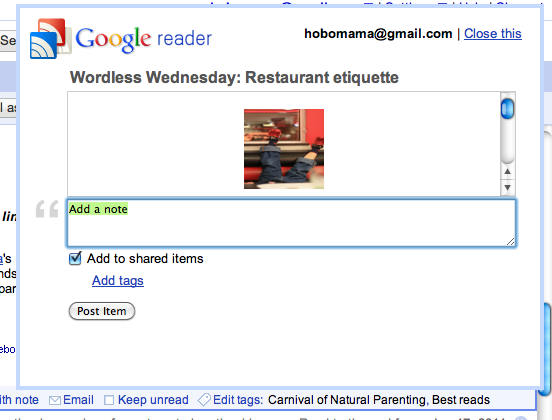
"Share with note" lets you add a comment to your item. A box pops up like so:


You type in your comment and click "Post Item."

(Notice you could also add a note but uncheck "Add to shared items," if you wanted a private note to yourself.)

"Your shared items" in Reader

(Remember, click on any image to see it larger.)

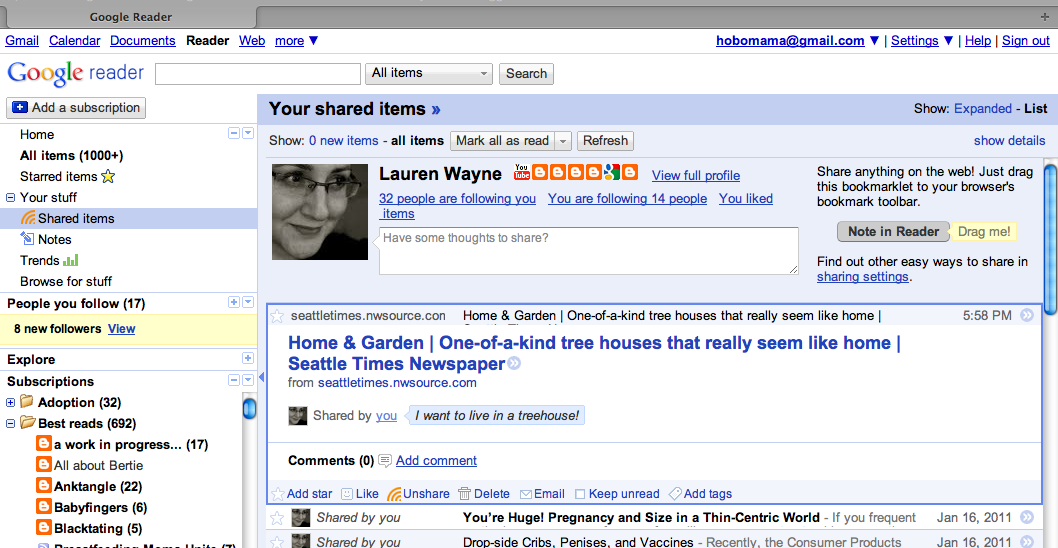
To see the items you've shared, go to "Your stuff" in the left sidebar. If there's a plus-sign (+) next to "Your stuff," click on it to show the drop-down menu. Select "Shared Items." If you want to see only the items you've left notes on, click on "Notes."

You can see an article I shared and the note I wrote to go along with it in the blue box ("I want to live in a treehouse!").

(In case you're wondering, I blurred out my feeds because I give them weird names ;) and, yes, I have more than 1,000 unread items, which means I've broken the Google counters.)

How to unshare an item

If you want to take back your share, look at the bottom of the post where the orange icon is. The word will now say "Unshare," so just click it again to remove it from your shared items.

If you wrote a note, click "Delete" next to the little trash can instead (the icon that used to be a pencil and paper).

(Look at the picture above to see both the "Unshare" and "Delete" icons.)

Make your shared items public!

So now you've shared them, but who's seeing them? We have to go mess with the settings to make sure it's all the people you want!

The link for Sharing Settings is http://www.google.com/reader/view/#friends-manager-page. It's linked on various pages, such as toward the top of "Shared items" and "People you follow."

You can also navigate there (it's a little hard to find, but in case they change that link!) by going this route:


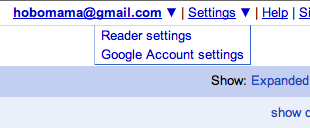
Click "Settings" in the top right header, and wait for the drop-down menu. Select "Reader settings."

(Remember, click on any image to see it larger.)


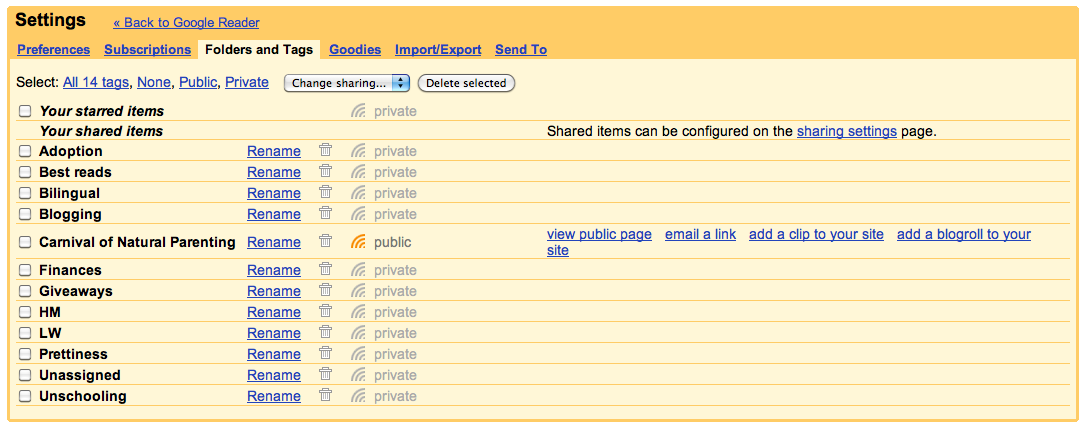
Click the tab that reads "Folders and Tags." There you can see the message next to "Your shared items," "Shared items can be configured on the sharing settings page," and "sharing settings" is linked. Ta-da!


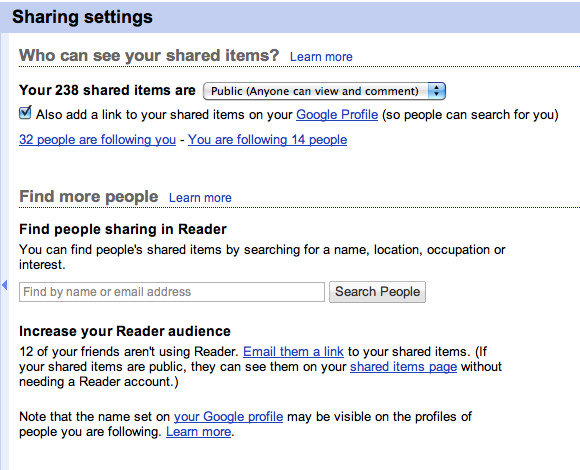
The top option lets you choose whether your shared items are "Protected" (you choose which groups can view them, based on your Google Contacts) or "Public" (open to anyone online). You can also see whose recommendations you're following, and who's following yours, and you can search for new public shared item feeds to track.

Set your style


Now that you have a public feed, you also get to style your Shared Items page, on the same "Shared settings" page. There are four (rather limited) options, so choose whichever one makes you happiest.

You can also choose a custom URL (such as http://www.google.com/reader/shared/hobomama), which makes it easier to tell friends about your new public feed.

We'll talk more about emailing the link below, and we'll get into adding a clip to your blog in a future installment, but feel free to play around!

Your public feed

Now when you click either on "Preview your shared items page in a new window" or paste or type that new URL into a window, you will see what your public sees.


Reader pulls information from your Google profile (such as your name and links to other public accounts), so make sure your Google profile is displaying information the way you want it.

Share your shared items!

Now you can hand out the URL of your public feed (e.g., http://www.google.com/reader/shared/hobomama) to let people know to follow along or subscribe.

People can also follow you in Google Reader by entering your name under "Find more people" on the "Sharing settings" page. They'll then click on "People you follow" in the left sidebar to see your shared items mingled with the items of other public feeds.

In "Sharing settings," there are two opportunities to email a link to your shared feed to your friends. They don't even need a Google account (just internet access) to view your shared items feed. If they do have a Google account, you could recommend that they follow you in Reader.

Have fun and start sharing!

And stay tuned for advanced Google Reader goodies!

Incidentally, feel free to follow my shared items public feed! I share articles about parenting, blogging, and writing, along with other fun tidbits, such as about treehouse living. You can also follow me in Google Reader by entering "Lauren Wayne" under "Find more people" on the "Sharing settings" page and finding my cute little face.

1.12.2011

Choosing who can comment in Blogger: Allowing the option of name and URL

Dionna of Code Name: Mama and I are writing a few blogging tutorials of particular use for our Carnival of Natural Parenting participants. This topic is loosely related to the carnival, because certain options allow for easier commenting on Blogger blogs.

Do you want to adjust your comment settings in Blogger to determine which readers can comment?

Choosing what permissions to grant commenters (from requiring registration to allowing anonymous commenters) can affect how easy it is for people to comment — and, therefore, how likely readers will be to convert to commenters. Specifically, you might receive more comments if you allow commenters to type in their own name and URL or comment anonymously, because it can be appealing for certain commenters.

Everything has its pros and cons, of course, which we'll cover in a bit. For now, here's where you find the options, what they mean, and what they look like in action.

The four commenting permission options in Blogger

Blogger has four permissions options for its commenting system. Go to your Dashboard, then choose the Settings tab, then Comments. (There's a main tab labeled "Comments," as well, but we want the sub-tab under Settings.)
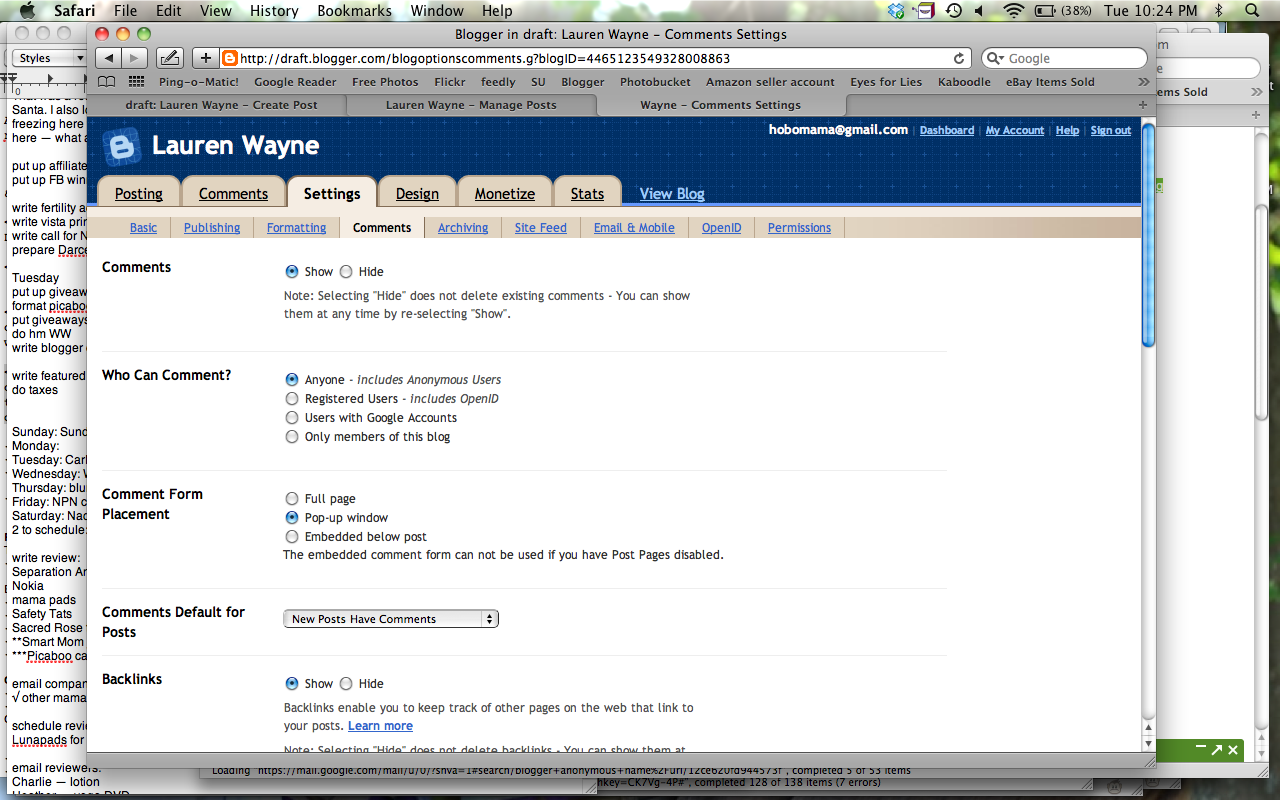


Look for "Who Can Comment?"

Here are the options. Start from the bottom up to go from most restrictive to least:

  1. "Only members of this blog" — Commenters have to be contributors or administrators of the blog and must be logged in to Blogger to comment.
  2. "Users with Google Accounts" — This is the default for Blogger. Anyone commenting must have a Google account and sign in to Google.
  3. "Registered Users  - Includes OpenID" — This opens up commenting to people who don't have a Google/Blogger account but still requires that they identify themselves in some way by logging in with an outside account. This expands the accounts commenters can sign in, in addition to Google, with LiveJournal, WordPress, TypePad, and AIM. Commenters choose their preferred account, enter their URL or username, and then OpenID takes them to a separate page to authorize with their password.
  4. "Anyone - Includes Anonymous Users" — This is the most open of all the commenting options, and is the only one that allows for Name and URL entry. It also is the only one that allows anonymous commenters.

Once you decide which option you prefer, select the little circle next to your choice. Then scroll to the end of the page and make sure to click Save Settings.

Here's what they look like in action, both from the perspective of the commenter, and what a comment looks like live when it's published. Then we'll talk a little bit more about why you might choose each of the four options.

What the commenting options look like


Here is what each option looks like, first from the commenter's perspective on the comment form, and then live once published. (Your comment form might look different, depending on which form option you chose, but the permissions options will be the same.) In these examples with the comment form, I've selected option #4 up above, allowing all users, including name/URL and anonymous. If you've selected a more limited option, you simply won't see the extra options on the comment form, and Blogger will give a special message if only Google accounts are permitted to let commenters know that anonymous comments are not allowed.
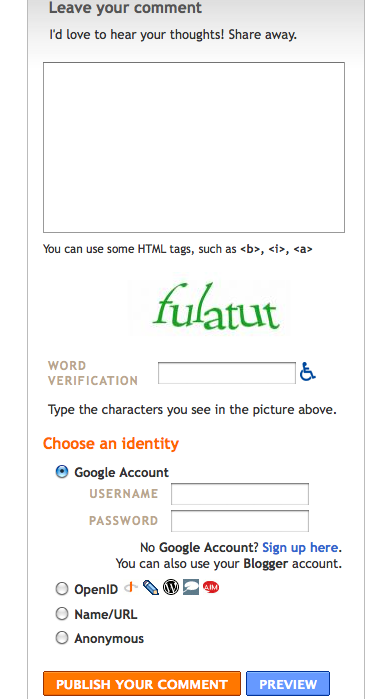


The first option is to use a Blogger/Google account. (This is the only option you'll see for #1 and #2 in the permissions options above, and this option will remain visible for #3 and #4.) Commenters can sign in on the comment form; if they're already signed in, their Google profile name will already show up in place of the username/password sign-in section and they can opt to sign out if desired.

Live, the comment will show the display name they chose for their Google/Blogger profile, as well as any avatar they uploaded, and it will link to the profile. The profile can then direct a reader to the commenter's blog and other information. Here's what it looks like in action:
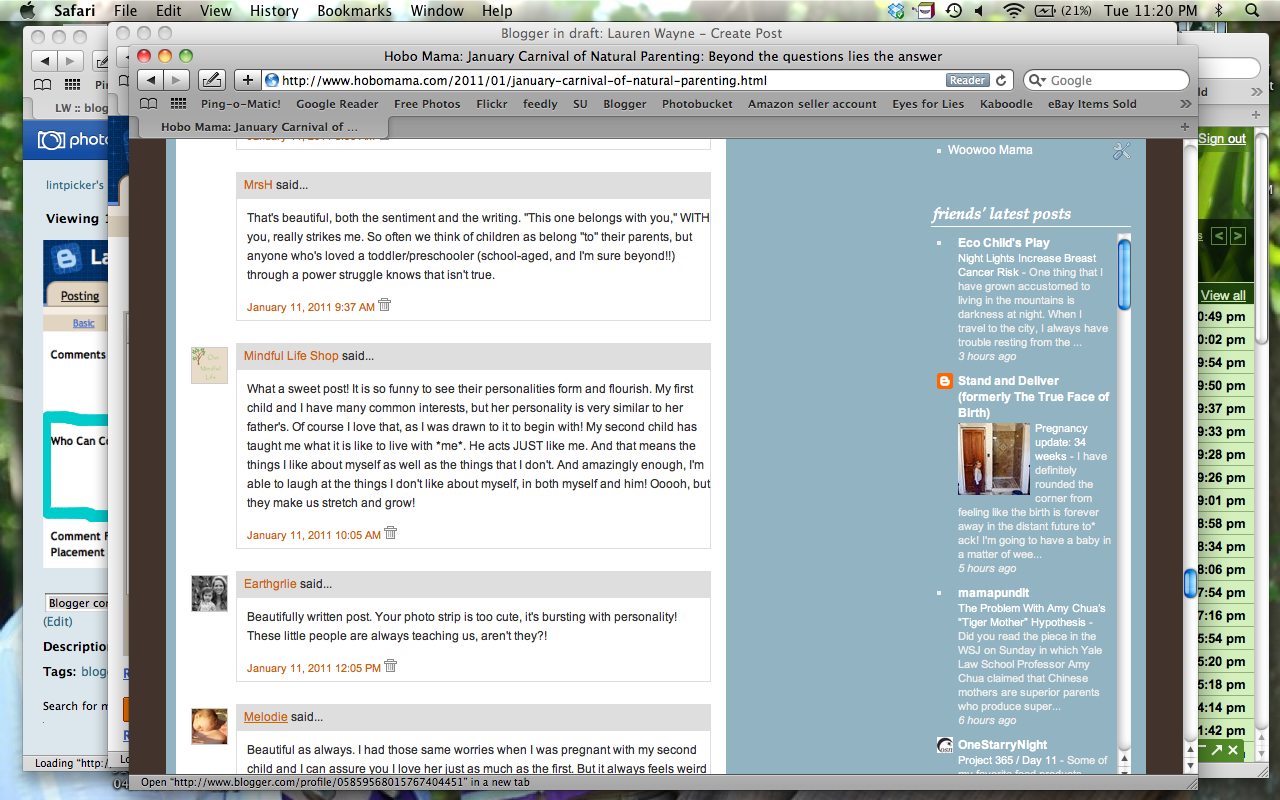

I was hovering my mouse over the link, so the linked profile is shown in the bar along the bottom.
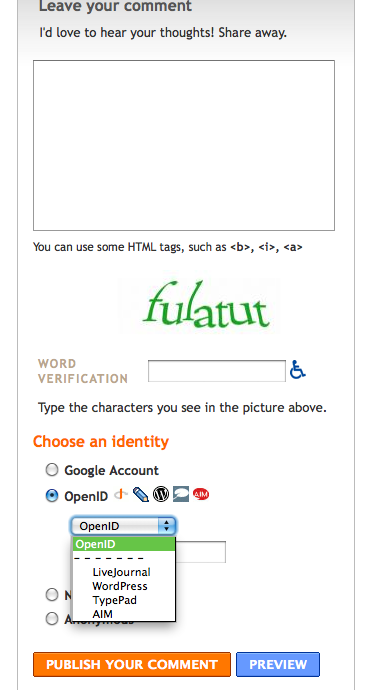


As mentioned before, OpenID allows commenters to sign in with LiveJournal, WordPress, TypePad, or AIM. (This corresponds to permissions option #3 as well as #4 from above.)

Here's what an OpenID comment looks like online:
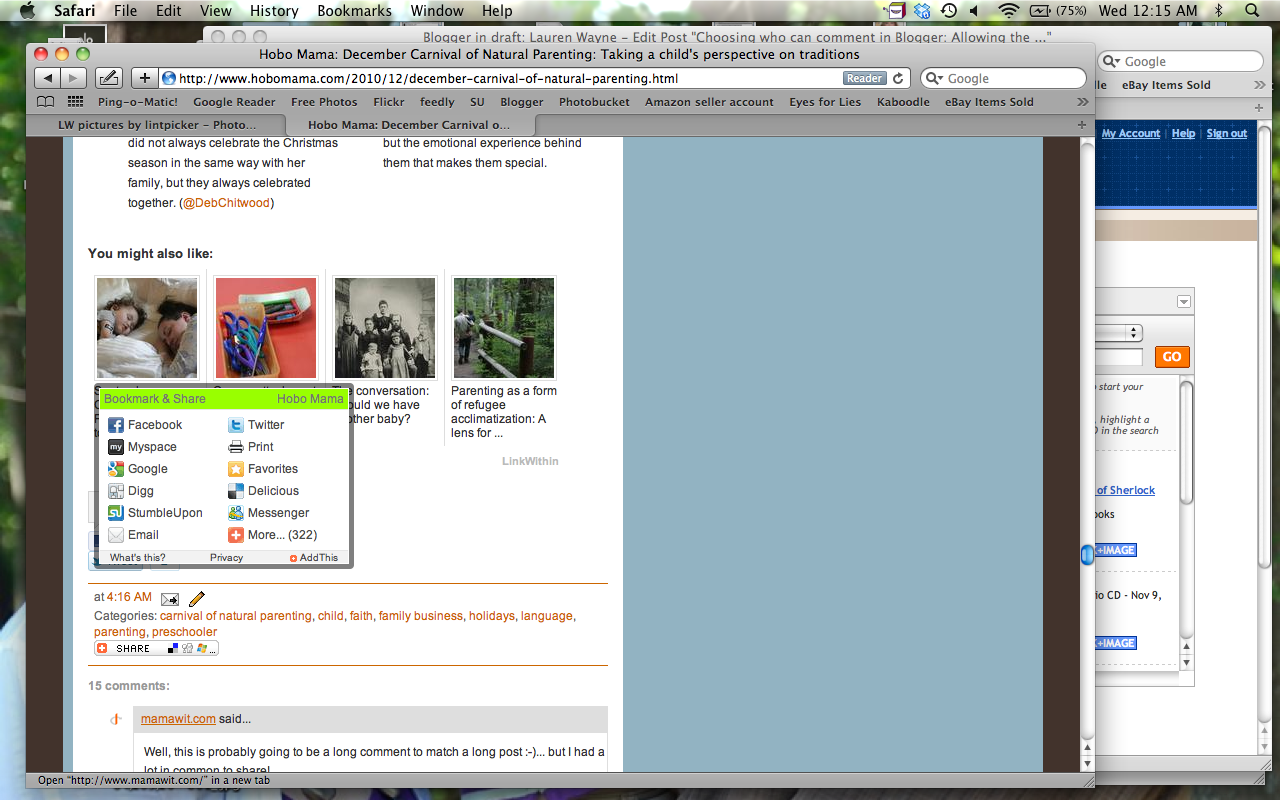

You can see the OpenID icon next to the person's name, and that their registered website is linked up.
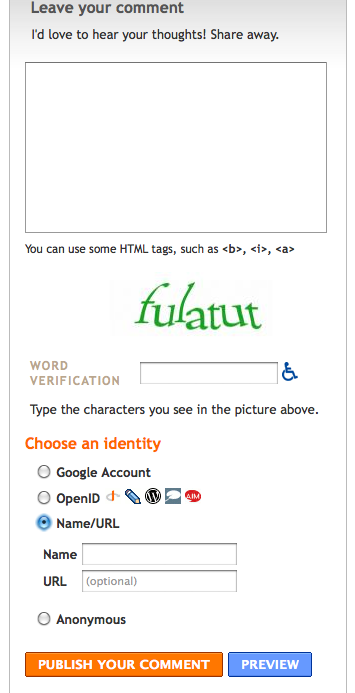


This is the Name/URL option. Entering a URL is optional. Therefore, a person can comment, for all intents and purposes, anonymously using this option by entering a name (or pseudonym) in the Name field but no URL below. (This you will see only with permissions option #4 above.)
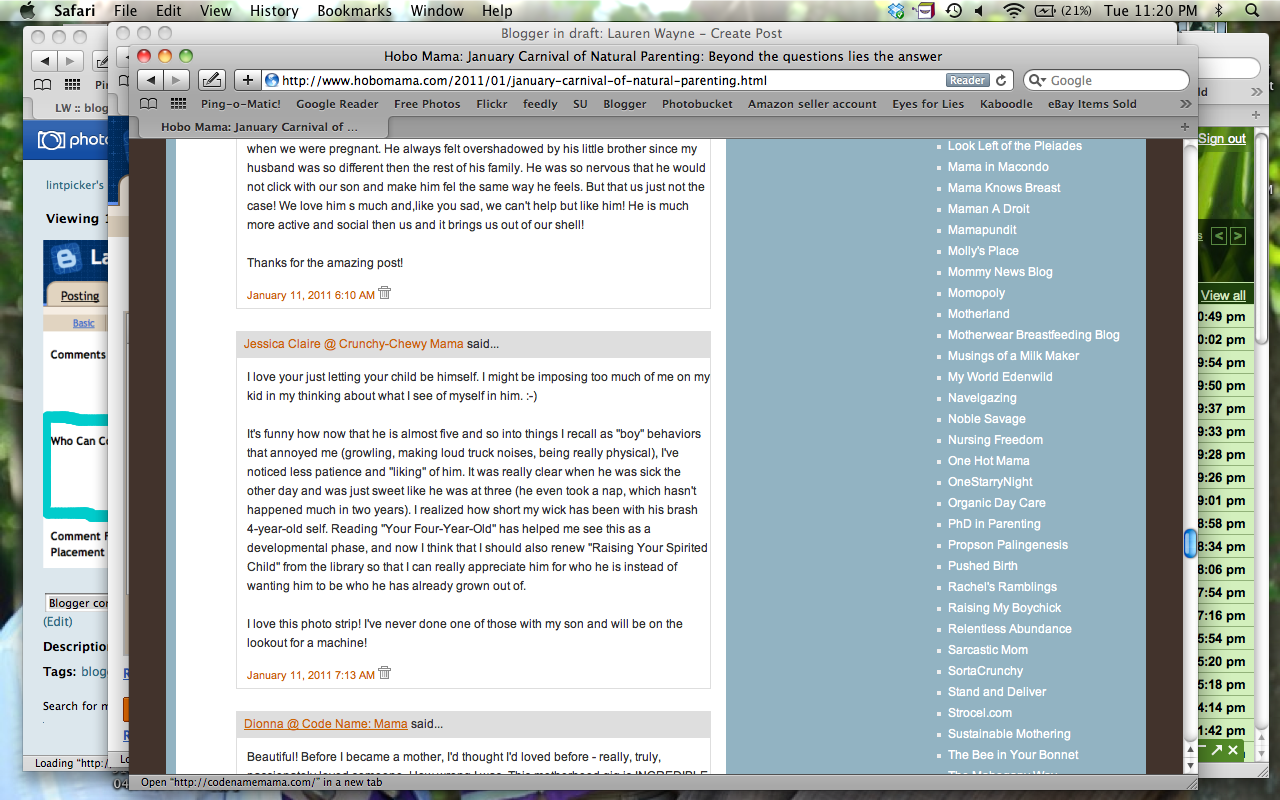


This is what name and URL look like published. The name for the commenter shows whatever the commenter has entered in the Name field, there's no avatar associated, and the linked site is whatever was entered into the URL field. Again, commenters can choose not to enter a URL, in which case the name would show up without any link, similar to Anonymous below.
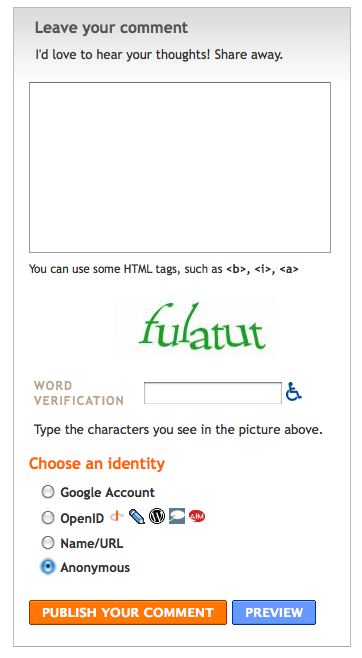


This is the completely Anonymous option. No information is taken from the commenter at all. (This also you will see only with permissions option #4.)
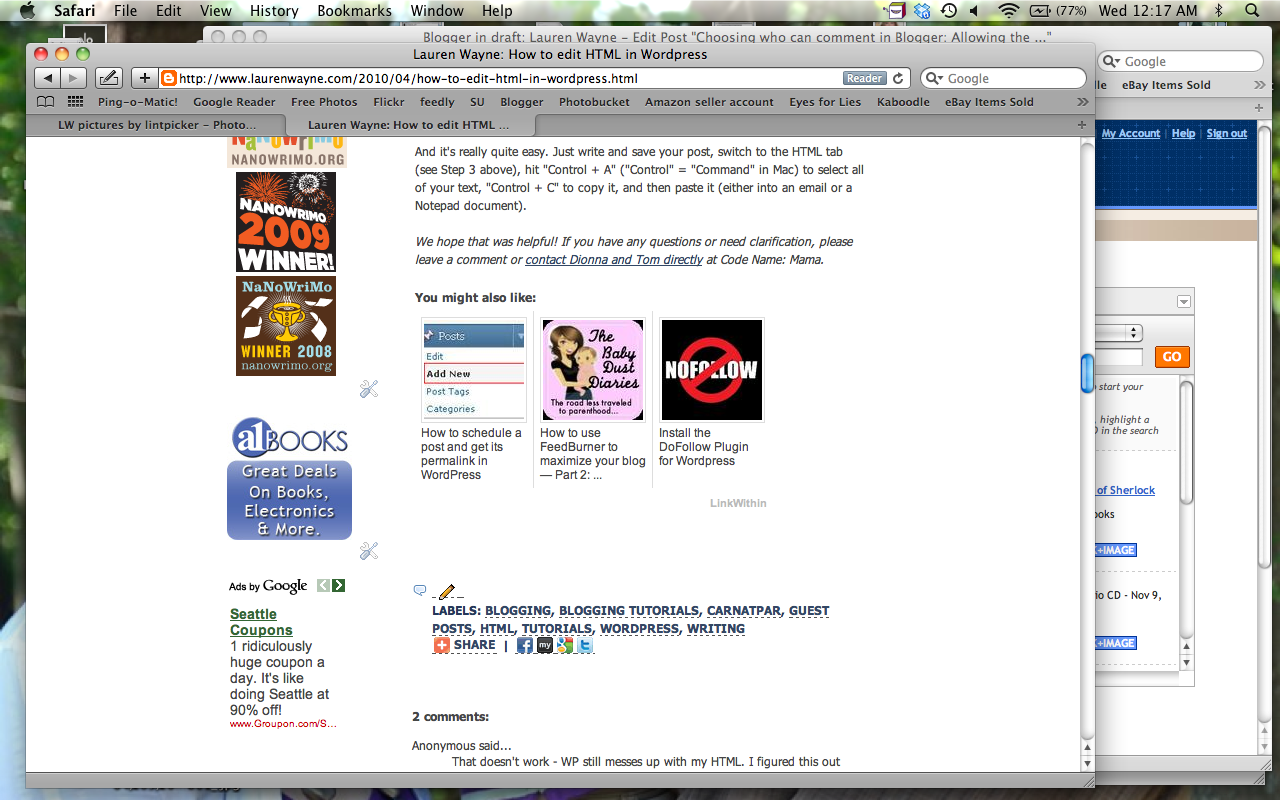


This is what an anonymous comment looks like. As you can see, there's no linking at all, and it's fully anonymous. Name/URL comments without a URL will look the same, with whatever name was entered into the Name field in place of "Anonymous."


Pros and cons of the four options


You have to consider your own comment policy when choosing your permissions options. How open or restricted do you want your blog to be to commenters?

I'll go through each of the four options and describe why you might choose each.
  1. "Only members of this blog" — This would be useful, as far as I can see, only on a private or semi-private group blog — for instance, if you started a blog so that a group could share ideas with each other, or if your family had a blog where each member could post pictures and updates but you weren't inviting public exposure. You will obviously limit the comments you receive, because no uninvited outsiders can comment at all. This can be useful if you want to keep discussion limited to team members.
  2. "Users with Google Accounts" — This is a good option if you want to have a safeguard up for who can comment. It's likely to keep the laziest spammers and trolls away, because it requires signing into an established Google account. However, it doesn't guarantee that you as the blogger will know where commenters are coming from; Google profiles can be marked as hidden. For commenters who have their own sites, it doesn't give as much instant gratification in terms of linking to their blogs, because it's a two-step process: Click on profile link, then click on the website from the profile (if linked there). Google profiles aren't that customizable, either. A plus for commenters is that many, many people have Google accounts now, so it's likely they'll already be signed in to one, making commenting straightforward. It will, however, exclude anyone who doesn't have a Google account and doesn't want to create one, or who doesn't want the Google account publicized, even with a hidden profile.
  3. "Registered Users - Includes OpenID" — OpenID allows bloggers from other platforms to log in as authorized users and leave a comment. This will give some traceability to comments, which again reduces the likelihood of spam or troll comments. A downside for commenters is that OpenID isn't as readily understood as the other commenting options. Because it goes to an extra page for logging in, there can be fear (sometimes justifiable) that a comment draft will be lost before the log-in process is completed (or if it cannot be completed, due to a mistyped password or the like). It also doesn't allow for personalized avatars next to the commenter's name, just the default OpenID icon.
  4. "Anyone - Includes Anonymous Users" — This, the most open of all the commenting options, will greatly please bloggers who wish to have a clear link to their own website, and will also relieve genuine commenters who don't have a handy account to log into to comment. However, it also opens you up to the most troll and spam comments, due to the ease of the anonymous functions. See below for some further thoughts on this. Some blogs might be conducive to supporting anonymous commenters, such as if you regularly write about sensitive subjects and wish for there to be frank conversation, if you want numbers of commenters over quality of discussion, or if you want ease of quick and repeated commenting, such as for a giveaway site. (Again, setting your comment policy will help you determine your own goals.) You will probably attract the most commenters with this option, because it allows for the easiest commenting and the most possibilities for commenters to choose from.

Here's my opining on the four options. I used to allow #3, the Registered Users option with OpenID. However, I eventually switched to #4, for the purpose of allowing Name/URL comments. However, I dislike that I can't turn off anonymous comments separately. I feel like there should be an option before #4 that allows a WordPress-like comment option (name and email address required, with URL as an optional field), but no anonymous users. Sure, trolls and the like could still enter a fake or unused email address and a pseudonym (or "anonymous"), but at least they'd be traceable to some extent, and the accountability would, I think, cut down on the nasties.

I'd also like to be able to track and manage IP addresses from commenters, so that I can block repeat offenders, whitelist the good guys, and identify problem commenters from the back end.

(As we're making our wish lists, take a second to vote on Blogger ideas you like best, and let's cross our fingers they're implemented soon!)

If you are in the same boat of wanting to open your blog to the most commenters you can but would rather avoid spam and trolls, there are a few actions you can take, in rough order from most difficult to easiest:

  1. Switch to WordPress or an alternate blogging platform. This isn't a sarcastic joke; I know people who have switched for the comments alone. For me personally, it's not worth it. I'm comfortable with Blogger — to the extent that I switched this blog from WordPress. But switching to WordPress would indeed give you WordPress-like commenting features!
  2. Install an alternative commenting system. The two I know of for Blogger are Disqus and IntenseDebate. I went back and forth on the idea of one or the other, and even tried them out on a test blog, but they both had their drawbacks as well. Also, you'll want to be fairly confident with fooling around with your template's html and other settings if you want to install outside comments (which means you're probably not reading my tutorials, see?). For now, I'm sitting tight and waiting for Blogger to improve…
  3. Heighten your moderation of comments in Blogger. The good news is, Blogger has finally implemented a spam filter, so many spam comments are indeed caught in that net now (not all, but the most obvious and offensive ones generally are). You can add to your defenses by going to Dashboard --> Settings --> Comments again and scroll down to the sections marked "Comment moderation" and "Show word verification for comments?" I'll go through these options more thoroughly in a future post, but for now, just know that you can choose whether comments post automatically, or whether you get to review them ahead of time (either in email or in your main Comments tab). Know, too, that you can at any time delete a comment that doesn't square with your policy, and you can mark spam comments as such to improve the filtering over time. For word verification, you can choose whether commenters must type in a random "word" to comment, as seen in the comment form screenshots above. This greatly cuts down on the amount of automated robo-spam. You can also turn off comments entirely on certain posts, such as after a determined number of days or if you're receiving more spam than usual on particular posts. There are pros and cons to all these comment moderation choices, so I'll discuss that in more detail later. Basically, the fewer restrictions you have, the easier it is for people to comment, and the more freely they are likely to comment. This includes genuine readers with insightful things to say — and spammers selling you their latest pills, as well as mean anonymous types swooping in to flame you and scurry. It depends, again, on how open you wish to be, what environment you want to cultivate on your blog, and how hands-on you want to be about your comment moderating.


So, those are the current options Blogger has for allowing types of comments. Here's hoping for even more options in the future!

What commenting options have you enabled on your blog, whether on Blogger or another platform? What commenting options make you most likely to comment?
Setting up thumbnail linkies & choosing the right dimensions

In honor of Wordless Wednesday, I bring you an entirely not-wordless post on crafting user-friendly thumbnail linkies — those link-ups that allow users to attach a small linked image and title on your blog, brought to us in this incarnation by Linky Tools (formerly McLinky). It's perfect for Wordless Wednesday, giveaways, recipe and craft roundups, and any other image-heavy blog hopping or blog carnivals.

There are other purveyors of thumbnail linkies, but I'm talking exclusively about Linky Tools in this tutorial.

I would specifically like to draw your attention to the length of the input box. For the user, this is the title of the thumbnail they enter.

First, an overview:

(Click on images to view them larger.)


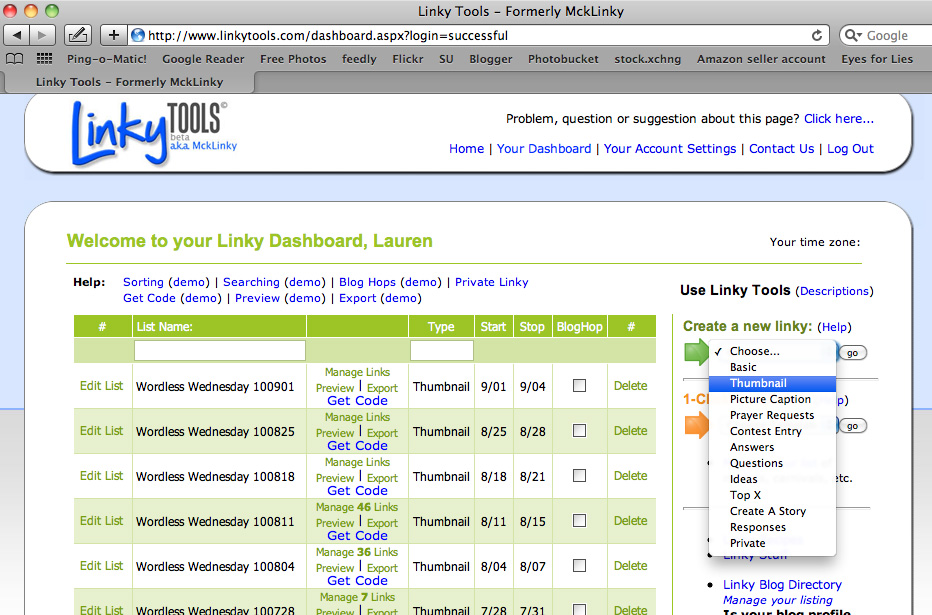
To create a thumbnail linky, simply go to your dashboard (you have to have created a free account beforehand), head to the right to "Create a new linky," and select "Thumbnail" from the drop-down menu before hitting "Go."


This is the default thumbnail linky page.

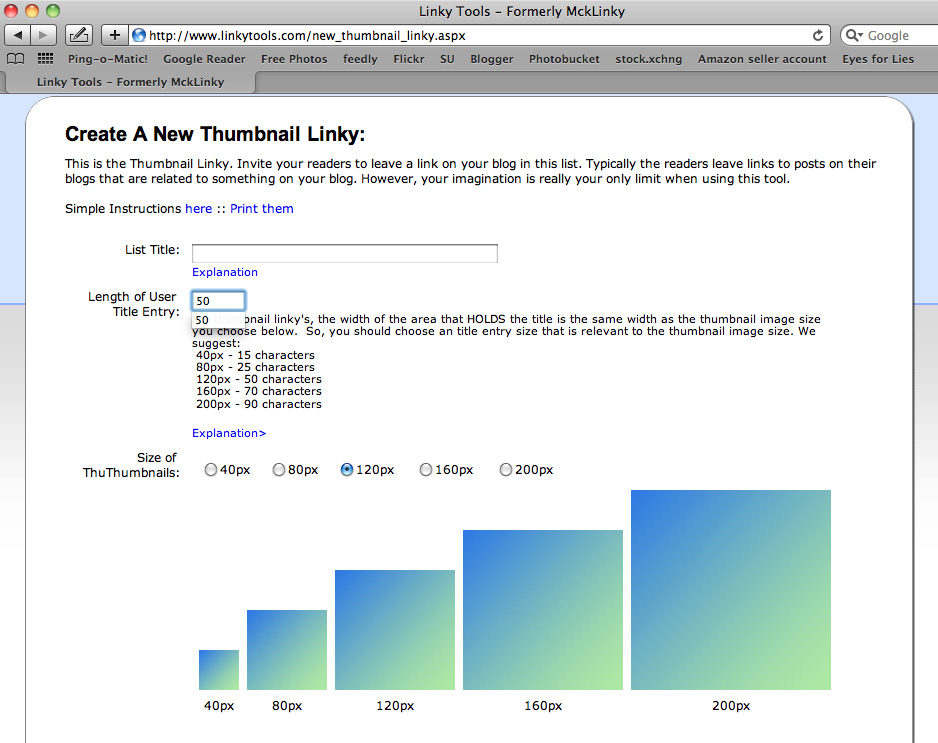
From the top down, here's what's on the page.

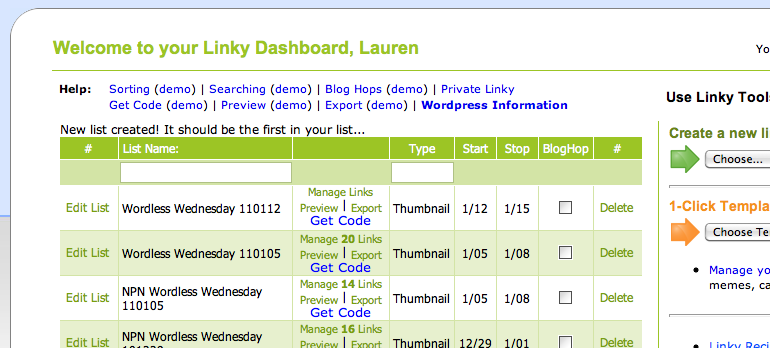
  • First, you enter a List Title. This is for your eyes only, just to keep track of the linkies in your dashboard. I date mine and note what the linky was for (e.g., Wordless Wednesday 110112).
  • The Length of User Title Entry is the fairly awkward terminology to describe how long the text box is the linker-upper will see. It's the title to the thumbnail that the user types in, and you determine how many characters they're allowed. The default is a puny 20 characters, so this is what you'll almost certainly want to change.
  • Size of Thumbnails (or, as it inexplicably but somewhat humorously reads, ThuThumbnails) is how big the images will be on your page. The default is the smallest, 40 pixels.
  • Start and Stop Date/Time (not in picture). This lets you set the duration. Ending the linky after a reasonable entry time helps cut down on spam links coming in later on. I keep Wordless Wednesday linkies open till Saturday, to give people a few days to straggle in. Giveaway linkies set to open on a certain day might stay open till the next week's linky goes live. The start date defaults to the current time you draft the linky. If you want to pre-date it or post-date it, you can do so. For instance, if I'm drafting a Wordless Wednesday post on a Tuesday, I typically set the start date to Wednesday at midnight, just to be matchy.

Choose the right sizes:


Here's where you can choose the size of the thumbnails and adjust the length of the user-entered title.

To skip down to the thumbnail sizes, Brent Riggs has helpfully provided blue-green squares demonstrating each size, noted below the squares as pixels (length and width), from 40 to 200.

I've found that most useful thumbnail linkies are between 80px and 160px. I use 120px. Very link-intensive pages often choose 40px. It somewhat depends on how many thumbnails you expect to receive, because the smaller ones will load faster, while the bigger ones will be more aesthetically pleasing.

Whichever size you choose, make sure you change the Length of User Title Entry.

Change it out from the default of 20 characters to a character length appropriate to the thumbnail size.

You can see Brent's help text:
"For thumbnail linky's, the width of the area that HOLDS the title is the same width as the thumbnail image size you choose below. So, you should choose an title entry size that is relevant to the thumbnail image size."
Then there is a suggested list of appropriately matching thumbnail sizes and character lengths. I recommend paying attention to the suggestions, because they generally work.

For instance, I use 50 characters to match my preferred thumbnail size of 120 pixels.

The problem with setting too few characters? Users won't have enough room to enter the title of their post, particularly for a giveaway linky, which usually demands a blog name, giveaway item, and end date. Twenty characters is nowhere near enough for most people to jam in that amount of info, so something in that case has to be left out. There might have to be a balance made in favor of larger thumbnails to allow users sufficient space to enter the characters they need (more characters for giveaways, fewer for Wordless Wednesday and other more casual link-ups).

The problem with setting too many characters? Some users will max out the character length, but then if the thumbnail is too small (or the blog's template calls for a font that is wider than average), some of the lines of text will be chopped off and lost. Since it's impossible for a user to self-edit an entry, there's no convenient solution for the user once that happens. There's only leaving it as is, double posting with a new and smaller title, or emailing the blog owner for help in the editing.

(Click to see images actual size.)

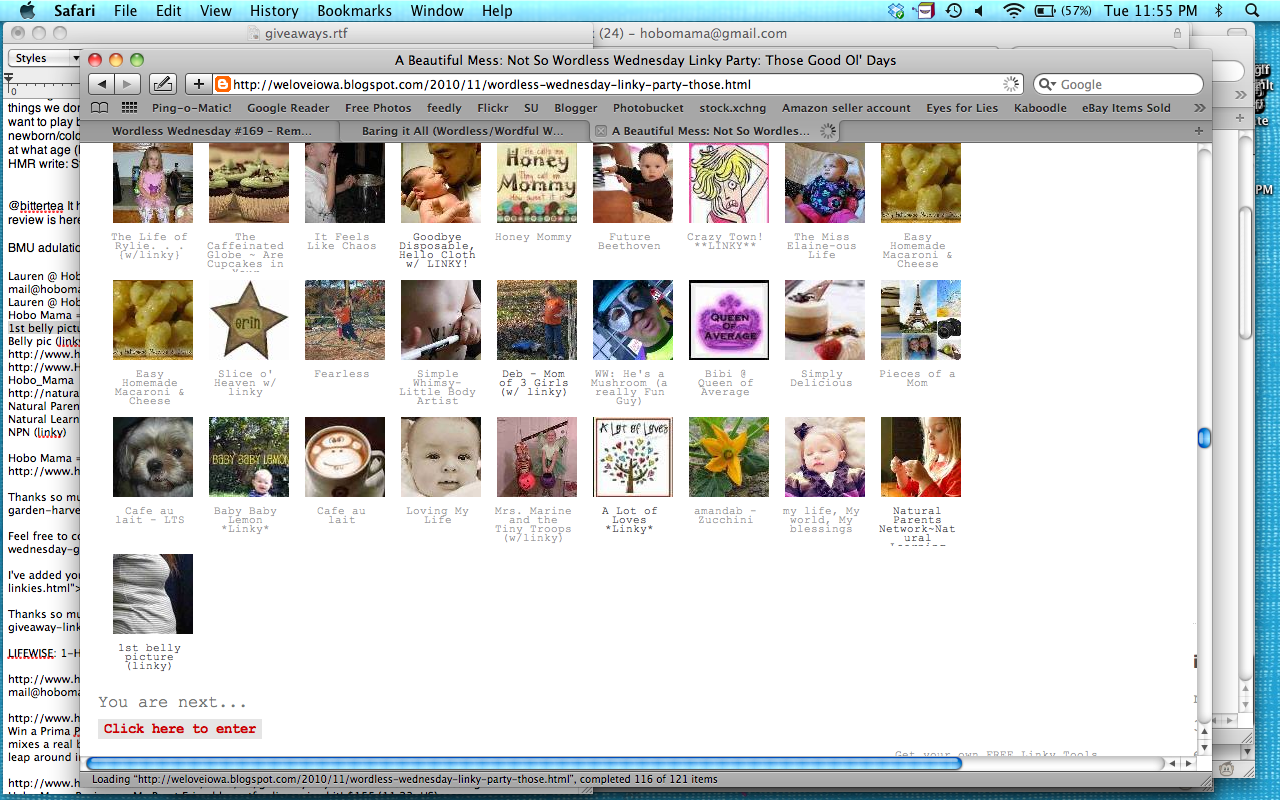
120 pixels with 50 character limit titles (from my blog) — the images are clear, and the titles fit in whole. However, this size might be too bulky for blogs with many links.


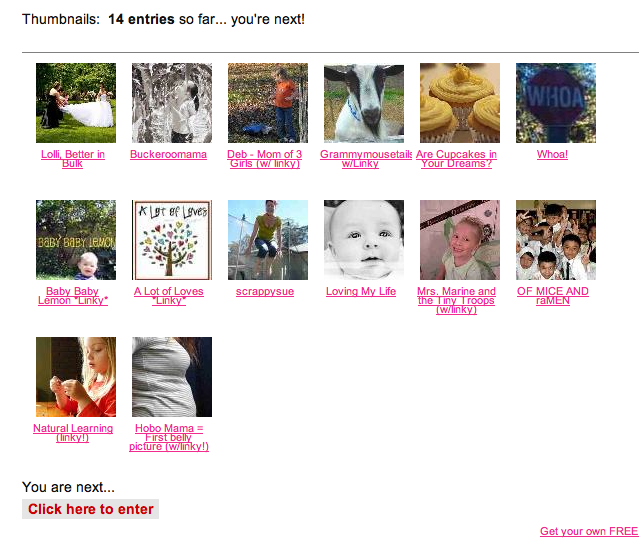
These above are 80 pixels in size with a balanced title length. (Again, click to see the image actual size.) Every title fits, although they're a little squishy vertically, which is presumably due to an interaction with the blog's template fonts and can't easily be altered (without altering the template, which seems like overkill for such a small problem).


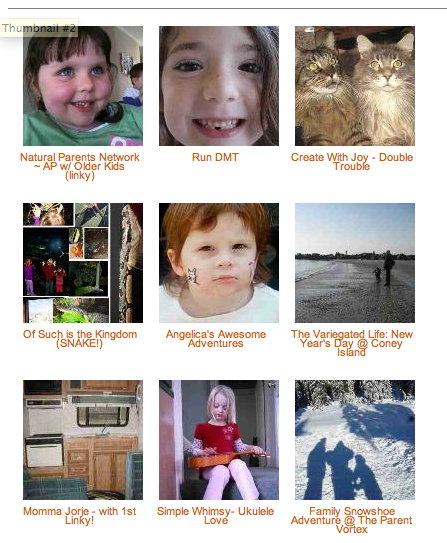
40 pixel size above (the smallest) with a character limit that's a little too big for the image width. Click on the image to view it actual size. You can see that the bottom right title for Natural Parents Network cuts off at the bottom. Even though it wasn't over the character limit, using that many characters exceeded the allowable display size. The 40 pixel size is petite, which makes images harder to see, but is useful for blogs that anticipate a lot of links and need a faster loading time.


So be sure to choose your image size and character length thoughtfully.

Grab the code:

Once you've chosen all your options, you can then save and create your linky. It will deposit you back onto the Dashboard, where you can get your code.


(Note that you can also Manage Links by deleting any that are objectionable and Edit List at the lefthand side to quickly change your options, such as thumbnail size, character limit, and duration.)

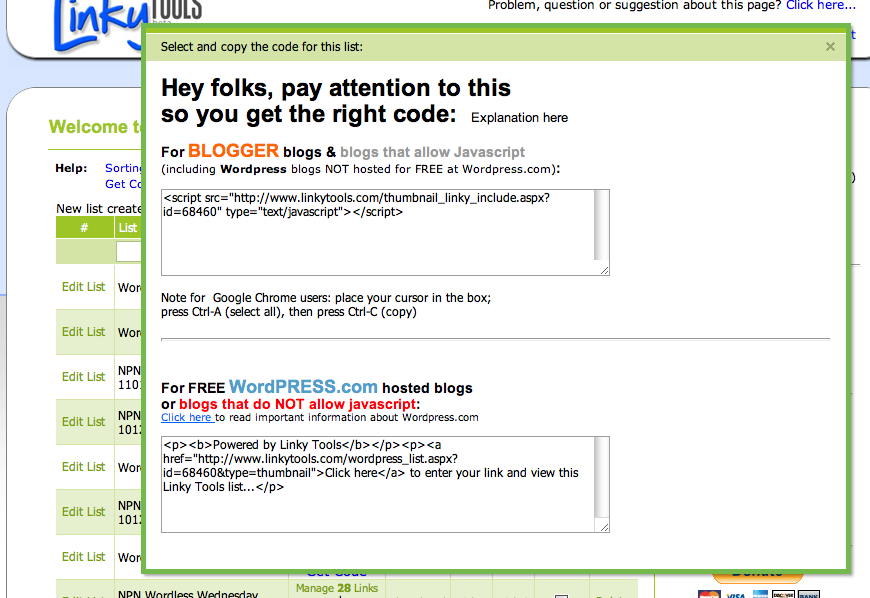
Once you click "Get Code," a box will pop up. One final warning: If your system is anything like mine, it will pop it up so that half the box (the relevant half for me, as it turns out) is hidden up past the top of my screen. I have to scroll up to see the full box, but that's what's needed.


Blogger, self-hosted WordPress blogs, and other blogs that allow Javascript should use the top code. (That's most people, in other words.)

Blogs hosted for free at WordPress need to use the bottom code. WordPress-hosted blogs don't allow Javascript, so Linky Tools hosts the linky in a separate window off-site. This is for blogs ending in .wordpress.com. If that's you, go with the second option.

If that's not you, go with the first.

And that's all. Paste it into your blog post. (See here for how to paste HTML into Blogger and here for how to paste HTML into WordPress.)

Once you publish your post (assuming you didn't set your start date to the future), your cute little thumbnail linky will be live and ready to accept that first eager linker.

Enjoy!
Related Posts Plugin for WordPress, Blogger...