5.20.2010

How to use FeedBurner to maximize your blog — Part 2: Advanced goodies

Paige of the Baby Dust Diaries is a NASA research librarian by day — and mother to Aellyn and inspiring blogger — well, I was going to say "by night," but let's say be accurate and say all the time. She has volunteered to write a few guest posts on topics that come naturally to her in her line of work. Visit Paige over at The Baby Dust Diaries for more on natural parenting, breastfeeding, gentle discipline, infertility, and life with a miracle baby.

How To Use FeedBurner To Maximize Your Blog — Part 2: Advanced Goodies

By Paige of The Baby Dust Diaries

In Part 1 we looked at the basics of why and how to start using FeedBurner. In this article we'll look at some cool things you can do now that you have a FeedBurner account.

1. FeedFlare

FeedFlare allows readers to share your post directly from their feed reader by putting social media sites directly in your feed. This service is not activated by default, but it is easy to use.

Click on the Optimize tab in FeedBurner and select FeedFlare.

FeedFlare screen on FeedBurner


In the list, select which services you want to include in your feed (there is also a site option which I won't look at in this article). Scroll down to the bottom to see what it will look like in your feed.

FeedFlare Preview and Ordering Screen in FeedBurner


You can click and drag to rearrange your FeedFlares. I think going with the most used services is smart. You can add hundreds more that have been created by users. The one I recommend adding is Twitter which you can add by copying this URL: http://www.feedburner.com/fb/static/flareunits/twitthis.xml into the Add More FeedFlare box

Flare Unit screen for FeedFlare


Once you like the FeedFlares you've chosen and their order click on Activate.

activate FeedFlare in FeedBurner


2. BuzzBoost

Now we can get really fancy. My favorite service in FeedBurner is BuzzBoost. It seems like such a simple thing but it can be really powerful if you know how to use it. What BuzzBoost does is give you HTML code that will embed your blog's feed in any website in which you can put HTML. With one piece of code the feed will update automatically.

So, how does this help? Have you ever wanted to have a static page or widget on your blog with your posts on a particular topic? For example, I have pages on my blog on some of my main topics. For example, I blog a lot about Infertility and I have a static page with some introductory text and then I wanted to show my most recent posts related to Infertility. If you click on the page you can see I have a list of my Infertility blog posts. One way to do this is to manually type in the post title with link and a description each time you make a new topical post. Who wants to do that? BuzzBoost will do it for you automatically!

All you need to know is that you blogging platform has RSS feeds for each of your tags, labels, or categories and how to form them.

How To Find A Specific RSS Feed

In Blogger: Each of your labels has its own feed of the form http://xxx.blogspot.com/feeds/posts/default/-/labelname

For example, when I was on blogger I had the following feed for my label "infertility": http://babydustdiaries.blogspot.com/feeds/posts/default/-/infertility

In Wordpress: Each of your categories has its own feed of the form http://xxx.wordpress.com/category/categoryname/feed/

For example, in Wordpress I have the following feed for my category "infertility" http://www.babydustdiaries.com/category/infertility/feed/

Each of your tags also has its own feed of the form
http://xxx.wordpress.com/tag/tagname/feed/

For example, I have the following feed for my tag "cosleeping"
http://www.babydustdiaries.com/tag/cosleeping/feed/

I have less experience with Typepad, but this page has some instructions on how to get a category specific feed.

Now BuzzBoost the Feed

Ok you have your specific feed — now we want to BuzzBoost it! Log in to FeedBurner and click on the Publicize tab and choose BuzzBoost.

There are a number of settings you can choose for your feed once you Activate the service.

Buzz Boost feed settings in FeedBurner


You can preview what your feed will look like:

BuzzBoost preview of feed in FeedBurner


Once you are happy with how it looks you can copy the code provided:

BuzzBoost HTML code to copy into web page


This code can then be pasted right into the page or Text/HTML widget on your blog. Note: If you normally blog in a visual mode you will need to convert to HTML or Code view to paste the script. (Here's how to get to Edit HTML view in WordPress and in Blogger.)

Voila! Now each time you post something new with that cateogry, label, or tag it will automatically add it to your list!

You might find yourself using this in a number of different ways. Many bloggers have a list of essential posts or favorite posts. You could do this dynamically just by creating a "favorite" tag when you post. You can also embed it directly in a post if you want to load related posts. For example, in my How Did You Find Me post I used Buzz Boost to summarize my posts based on my Google Analytics keywords.

3. Socialize

You can also use Feedburner to send your feed items to your Twitter account. This means that each time you publish a post it will be tweeted automatically. There are many other services to do this (like Twitterfeed.com and this plugin for wordpress) but what I like about using FeedBurner is the options it provides.

Go to Publicize > Socialize

Add your twitter account and choose your options. I really like that it includes a "leave room for retweets" since you want people to easily be able to pass the word about your posts this makes sure that the tweet is short enough to allow a "RT @yourname" to fit before it for retweeting purposes. You can also add hashtags and any additional text.

Select Twitter account screen in FeedBurner


Next you can choose how to order the items and how many new items to post. Note, this only looks for *new* items so you don't have to worry about spamming your twitter followers with multiple, repeat posts. For most bloggers there would only be one new post at a time. You can also use the keyword filter to only tweet items on a specific topic category or label from your blog.

Posting feed on Twitter with FeedBurner


You can see a preview of what your tweets will look like. Don't forget to activate the service.

Sample Preview of Tweets


That's it. Now all of your new posts will go to Twitter automatically!

I hope this helps you save time while maximizing the power of your blog. If you have any questions, I'd be happy to help! Contact me by commenting here or email me at babydustdiaries (at) gmail (dot) com.

5.18.2010

How to use FeedBurner to maximize your blog — Part 1: The basics

Paige of the Baby Dust Diaries is a NASA research librarian by day — and mother to Aellyn and inspiring blogger — well, I was going to say "by night," but let's say be accurate and say all the time. She has volunteered to write a few guest posts on topics that come naturally to her in her line of work. Visit Paige over at The Baby Dust Diaries for more on natural parenting, breastfeeding, gentle discipline, infertility, and life with a miracle baby.

How To Use FeedBurner To Maximize Your Blog — Part 1: The Basics

By Paige of The Baby Dust Diaries

In my day job I create, manage, and teach others how to maximize social media at NASA. Every time I write something like this article about utilizing Twitter, in my mind I'm writing a version for all my blog friends. Since Lauren and Dionna have put such great tutorials here to help specifically for the Carnival of Natural Parenting, I thought it might be nice to share some of the tools I use for blogging as well.

One of the tools I think every blogger should use is FeedBurner. FeedBurner is now owned by Google, but I've been using it since its inception and it just gets better and better. The main goal of FeedBurner is to maximze your blog's RSS feed — allowing people multiple ways to easily subscribe to your content. It actually does much more than that!

Manage Your Feed

If you do nothing else from this article you should definitely do this. Sign your blog's feed up for FeedBurner and change your subscription links to reflect this. First I'll explain why and then exactly how to do this.

Why?

First, it makes it easier for readers to subscribe to your blog. Instead of seeing raw xml like this (click on pictures to see them larger):

raw xml feed data

Your readers will see a friendly page with multiple options for subscribing to your feed including email:

subscribe to Feedburner feed page

Second, it makes your blog's feed free from the specific blog platform you are using. For example if you are on Blogger your feed address is something like http://www.babydustdiaries.com/atom.xml and if you are on Wordpress it looks like http://www.babydustdiaries.com/?feed=rss2. Now, first some RSS readers don't accept all formats, so a feed that ends in atom.xml might not be compatible. More importantly if you ever need to move your blog (like I recently had to from Blogger to Wordpress) all of your readers would need to be notified and go out of their way to resubscribe to your feed.

With FeedBurner you are given a custom feed address similar to http://feeds.feedburner.com/TheBabyDustDaires that will never change. This means when I went from Blogger to Wordpress it was transparent to my readers who were already subscribed. They didn't have to do anything!

How?


It couldn't be easier to sign up for FeedBurner (and it's free!). FeedBurner will even "discover" your feed if you don't know the URL.
  1. You can sign in to FeedBurner with your Google account (the same if you have Gmail, or a Google Reader Account) or you can create an account.
  2. Once you are in, just put the URL of your blog (e.g. http://myblog.blogspot.com) in the FeedBurner box and hit enter. You will then be prompted to give your feed a name and custom addressFeedburner feed info screen
    You want to write down this URL since we'll be using it in a moment. (And you can always find it again at the top of your feed's page under Edit Feed Details.) Click Next.
  3. Next FeedBurner asks if you want to track usage of your feed. You can choose what is important to you here and you can always change your mind later. Click Next.
  4. Now we want to direct your blog's feed to the new address.

    In Blogger:

    From your Dashboard go to Settings > Site Feed and then enter your FeedBurner address (inlcuding the http://) in to the Post Feed Redirect URL box.

    In TypePad:

    From your Dashboard go to Configure > Feeds section.Typepad Feeds Tab

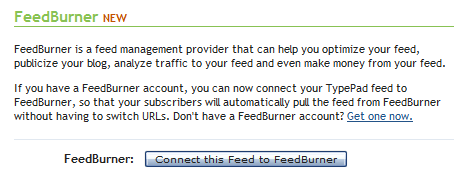
    Click on Connect this Feed to FeedBurner.

    Connect TypePad feed to FeedBurner

    Enter your FeedBurner username and password and click Sign In.

    FeedBurner sign in on TypePad

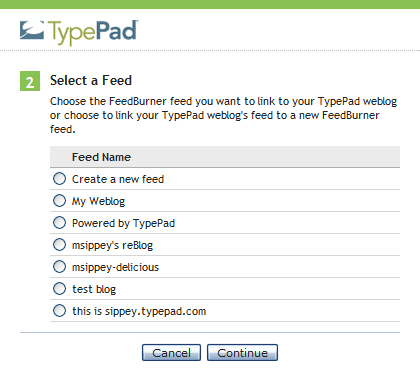
    Select the FeedBurner feed you just created and click Continue.

    Select a TypePad feed

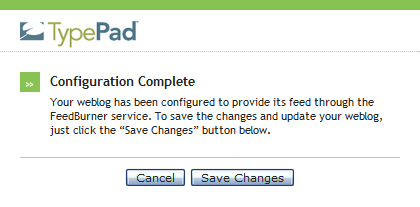
    Click Save Changes.

    Configuration of FeedBurner feed in TypePad complete

    In Wordpress:

    You can use the following method for self-hosted or Wordpress.com hosted blogs. Self-hosted blogs can also use this plugin. Feedburner has what they call a "Chicklet" or image tag that directs users to your feed.

    In FeedBurner click on the Publicize tab.

    Publicize in FeedBurner

    Locate and click the Chicklet Chooser service.

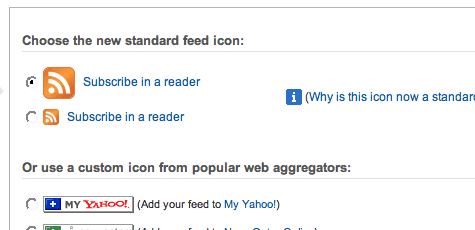
    The form shown below loads into the right side of the screen:

    Chicklet Chooser in FeedBurner

    This form contains several options for buttons that promote (and link to) your FeedBurner feed.

    Click the radio button next to the button you want to display on your site.

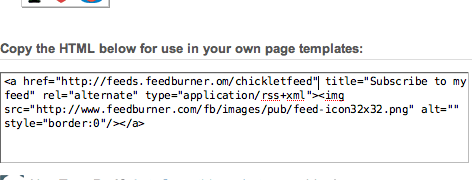
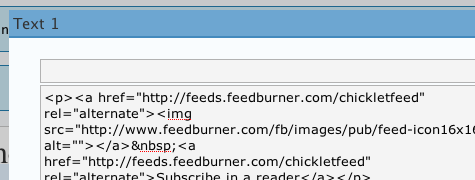
    Copy the HTML shown in the bottom section of the Chicklet Chooser. You will paste this HTML into your WordPress site template.

    Chicklet html code from FeedBurner

    From the WordPress Dashboard, click the Appearance and then the Widgets option. Drag the text widget from the Available Widgets area to your Sidebar. Click the right side of the widget to expand it.

    Paste the code you copied from FeedBurner in an earlier step into the content field.

    Paste code from FeedBurner into WordPress Widget

    Click Save Changes.

    This Chicklet method also works on many other platforms. You can use a custom image instead of one of the ones they offer by hosting your own image and changing the code for the <img src="http://this is the URL for your image">.

That's the basics of using FeedBurner for your blog! Stay tuned for Part 2 for some advanced FeedBurner goodies!

If you have any questions I'd be happy to help! Contact me by commenting here or email me at babydustdiaries (at) gmail (dot) com.
5.04.2010

Losing a baby, in poems

These first three poems are from 2006, when our first pregnancy ended in miscarriage. You can read the story at HoboMama.com.

Death of the Firstborn

"This Birth was hard and bitter agony for us, like Death, our death." — T.S. Eliot

They all look quite like you at that age,
          and dead like nothing at all,
          a clot of purple-gray, sticky and wrapped with strong, black ribbons.

Feeling you leave in a gush of pain and red,
          in the blackest and loneliest part of the night,
was a hard & bitter agony,
          like giving birth,
giving birth to death.

Why were we led all that way, and never to see your face?
How could I do this again?
Death of the firstborn,
          and God spares no one,
          because why should we be passed over?


End of the Bleeding

Who knew I’d feel this desperate
To hold on to the bleeding?

To realize I can trade in maxi for mini,
And I insist on the industrial-size.

A few more drops of liquid life,
And you’re gone, little one,
Gone,
Along with all that housed you.

My uterus is an empty rented house,
Scrubbed clean,
Waiting for the next inhabitant.


Robin

"I am the resurrection and the life. He who believes in me will live, even though he dies. Do you believe this?" — Jesus

Robin like the hope of spring
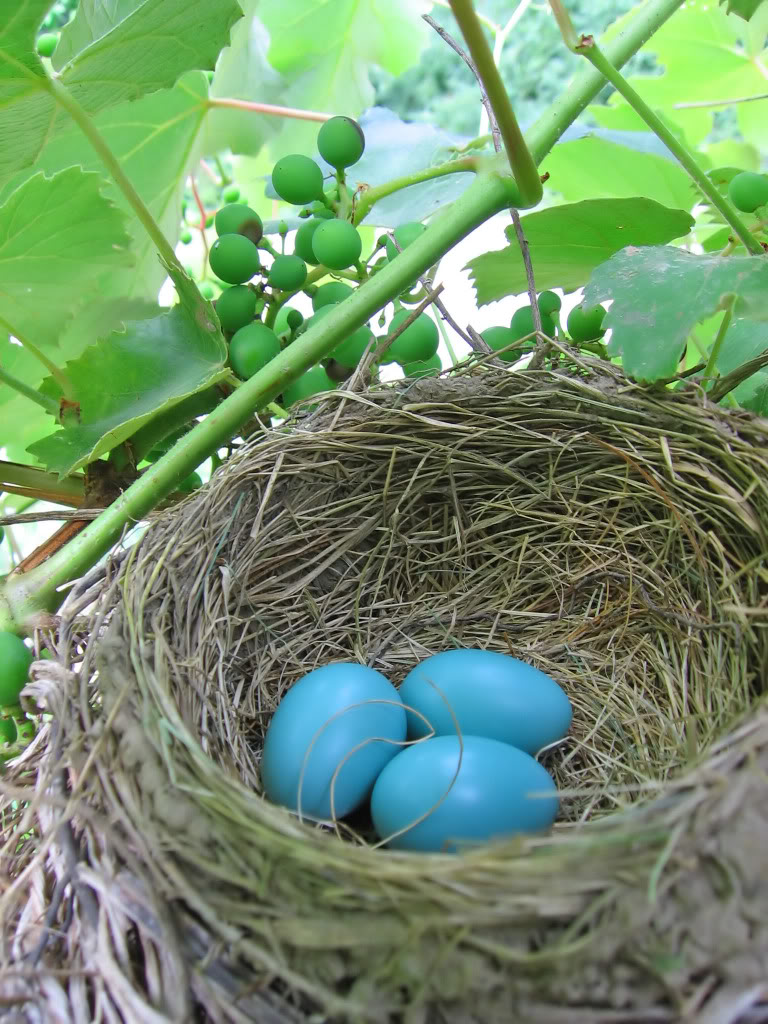
Robin like the blue of an egg, the peace of that blue filtering through me and healing

We buried you, Robin,
or maybe it was umbilical cord or placenta or blood (but let’s believe),
in the hardy mum that weathered
summer and winter, drought and flood,
one journey from East Coast to Midwest in the oppressive droopiness of summer,
and one from Midwest to West Coast in the blasting chills of winter,
and even my unmotherly indifference.
Will I one day be a Hardy Mum, Robin?
I feel more like a Bleeding Girl.

Robin, a unique mix of two people who loved you,
and we’ll never know if you had brown eyes or Irish green,
or if you skipped the odds entirely and went with your namesake blue,
like a daring surprise in a nondescript nest.
Would you inherit my chirping child’s always-singing voice,
your dad’s flights into the airy forgetfulness of thought,
my persistent hopefulness for a green thumb as I dig in the dirt?

Robin like a wish
Like a wish
Like a wish


And from this year, on Day 16 of the PAD Challenge, where the prompt was to write a death poem:

Mother after miscarriage

I hardly think of you anymore, Robin,
dear forgotten boy.
Tucked into the roots of the hardy mum,
just a few cells now dissolved,
nutrified, drawn into
the plant that sends out its blooms
early this year,
to remind me.


Poetry of a Hobo Mama: The First Three YearsYou can read more miscarriage and mothering poetry in Poetry of a Hobo Mama: The First Three Years,
available on Amazon and CreateSpace.


Robin egg photo courtesy Karen Barefoot on stock.xchng
Related Posts Plugin for WordPress, Blogger...