

 You can now schedule posts on your Facebook fan page (for a blog or company) or your personal Facebook page right in the native interface — no external application needed. This is helpful for several reasons:
- Posts that are natively entered into Facebook get more pageviews in the new Facebook news feed sorting. In contrast, if you have an RSS feed automated through Networked Blogs, for instance, chances are few people will see that post.
- Building traffic on your Facebook page requires frequent posting of links, status updates, photos, and questions — but it can be nearly impossible to do this consistently all day, every day. Plus, it helps to spread out your updates evenly throughout the day. Scheduling allows you to put in scheduling work when you have the time (whether that's daily or weekly or however it works for you), and then have links and updates unfold throughout the day.
- Unlike with external applications, Facebook's scheduling feature functions just like a normal status update: You can tag other pages, enter links, select thumbnails, etc. The only downside is so far you can't schedule a "share."
- The scheduling feature could be a little less odd, but overall, it's easy to operate. Read on for how!
Thanks to Momma Jorje for this tip! She's the scheduling queen.
(You can see I do a lot with this Facebook page.)
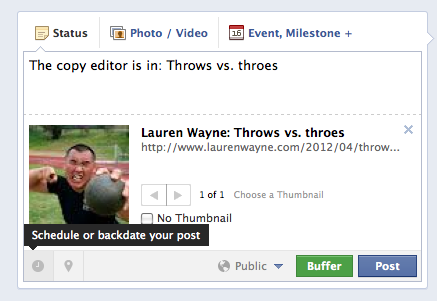
Now you're ready to schedule!
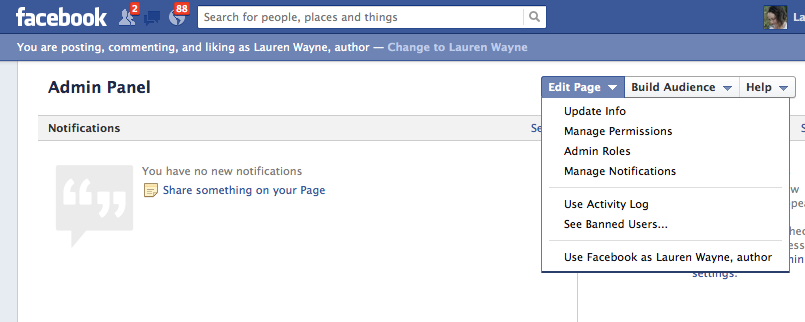
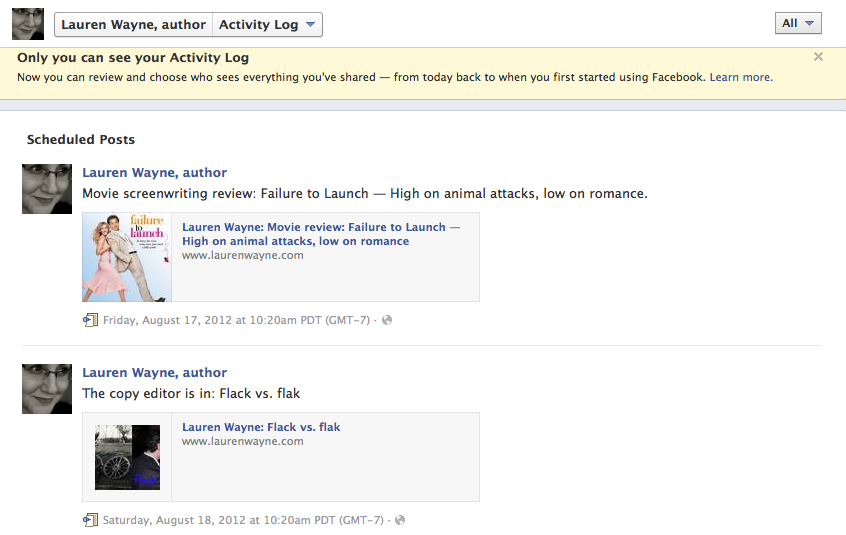
The page will refresh, and the post will be scheduled. If you want to see or delete scheduled posts, go back to your Admin Panel, click Edit Page and then in the dropdown menu, select Activity Log.


0 comments:
Post a Comment