
 In honor of Wordless Wednesday, I bring you an entirely not-wordless post on crafting user-friendly thumbnail linkies — those link-ups that allow users to attach a small linked image and title on your blog, brought to us in this incarnation by Linky Tools (formerly McLinky). It's perfect for Wordless Wednesday, giveaways, recipe and craft roundups, and any other image-heavy blog hopping or blog carnivals.
There are other purveyors of thumbnail linkies, but I'm talking exclusively about Linky Tools in this tutorial.
I would specifically like to draw your attention to the length of the input box. For the user, this is the title of the thumbnail they enter.
First, an overview:
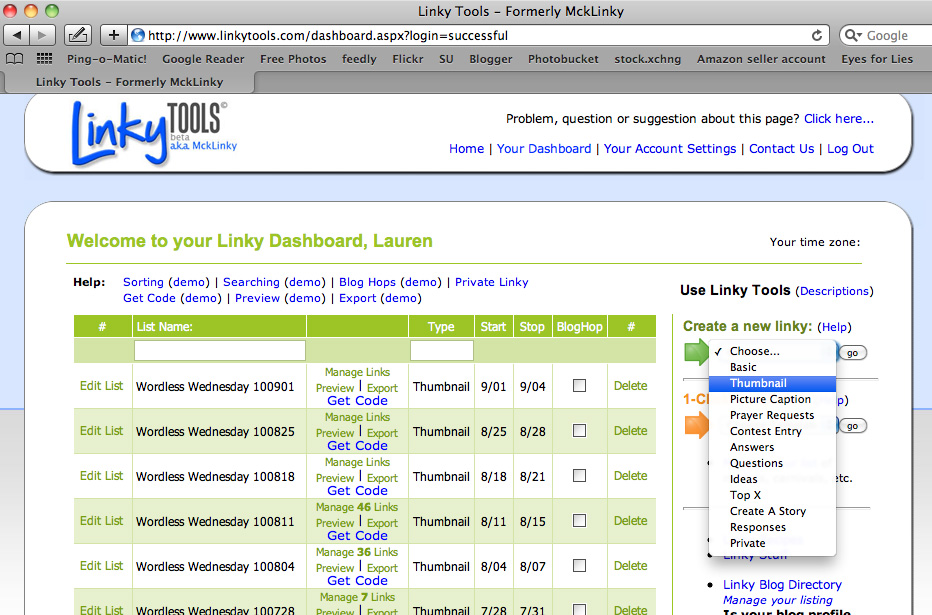
To create a thumbnail linky, simply go to your dashboard (you have to have created a free account beforehand), head to the right to "Create a new linky," and select "Thumbnail" from the drop-down menu before hitting "Go."

This is the default thumbnail linky page.
From the top down, here's what's on the page.
- First, you enter a List Title. This is for your eyes only, just to keep track of the linkies in your dashboard. I date mine and note what the linky was for (e.g., Wordless Wednesday 110112).
- The Length of User Title Entry is the fairly awkward terminology to describe how long the text box is the linker-upper will see. It's the title to the thumbnail that the user types in, and you determine how many characters they're allowed. The default is a puny 20 characters, so this is what you'll almost certainly want to change.
- Size of Thumbnails (or, as it inexplicably but somewhat humorously reads, ThuThumbnails) is how big the images will be on your page. The default is the smallest, 40 pixels.
- Start and Stop Date/Time (not in picture). This lets you set the duration. Ending the linky after a reasonable entry time helps cut down on spam links coming in later on. I keep Wordless Wednesday linkies open till Saturday, to give people a few days to straggle in. Giveaway linkies set to open on a certain day might stay open till the next week's linky goes live. The start date defaults to the current time you draft the linky. If you want to pre-date it or post-date it, you can do so. For instance, if I'm drafting a Wordless Wednesday post on a Tuesday, I typically set the start date to Wednesday at midnight, just to be matchy.
Choose the right sizes:
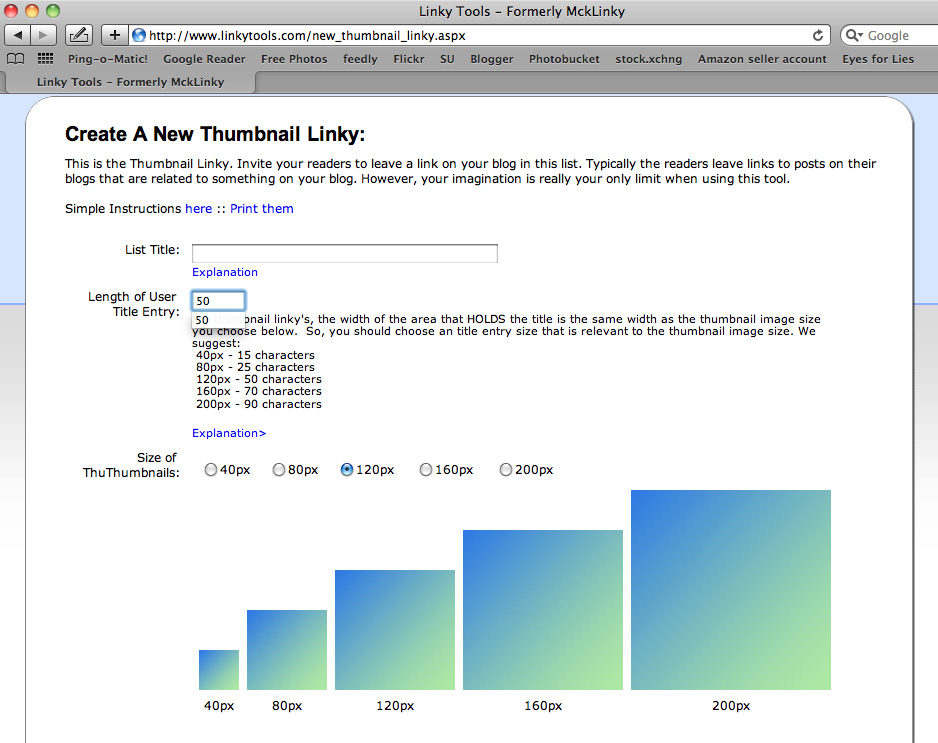
Here's where you can choose the size of the thumbnails and adjust the length of the user-entered title.
To skip down to the thumbnail sizes, Brent Riggs has helpfully provided blue-green squares demonstrating each size, noted below the squares as pixels (length and width), from 40 to 200.
I've found that most useful thumbnail linkies are between 80px and 160px. I use 120px. Very link-intensive pages often choose 40px. It somewhat depends on how many thumbnails you expect to receive, because the smaller ones will load faster, while the bigger ones will be more aesthetically pleasing.
Whichever size you choose, make sure you change the Length of User Title Entry.
Change it out from the default of 20 characters to a character length appropriate to the thumbnail size.
You can see Brent's help text:
"For thumbnail linky's, the width of the area that HOLDS the title is the same width as the thumbnail image size you choose below. So, you should choose an title entry size that is relevant to the thumbnail image size."Then there is a suggested list of appropriately matching thumbnail sizes and character lengths. I recommend paying attention to the suggestions, because they generally work.
For instance, I use 50 characters to match my preferred thumbnail size of 120 pixels.
The problem with setting too few characters? Users won't have enough room to enter the title of their post, particularly for a giveaway linky, which usually demands a blog name, giveaway item, and end date. Twenty characters is nowhere near enough for most people to jam in that amount of info, so something in that case has to be left out. There might have to be a balance made in favor of larger thumbnails to allow users sufficient space to enter the characters they need (more characters for giveaways, fewer for Wordless Wednesday and other more casual link-ups).
The problem with setting too many characters? Some users will max out the character length, but then if the thumbnail is too small (or the blog's template calls for a font that is wider than average), some of the lines of text will be chopped off and lost. Since it's impossible for a user to self-edit an entry, there's no convenient solution for the user once that happens. There's only leaving it as is, double posting with a new and smaller title, or emailing the blog owner for help in the editing.
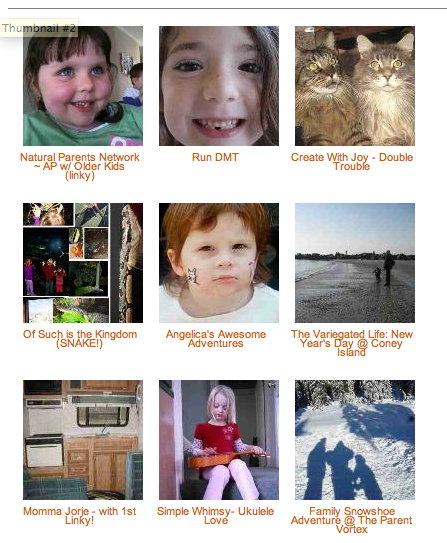
120 pixels with 50 character limit titles (from my blog) — the images are clear, and the titles fit in whole. However, this size might be too bulky for blogs with many links.
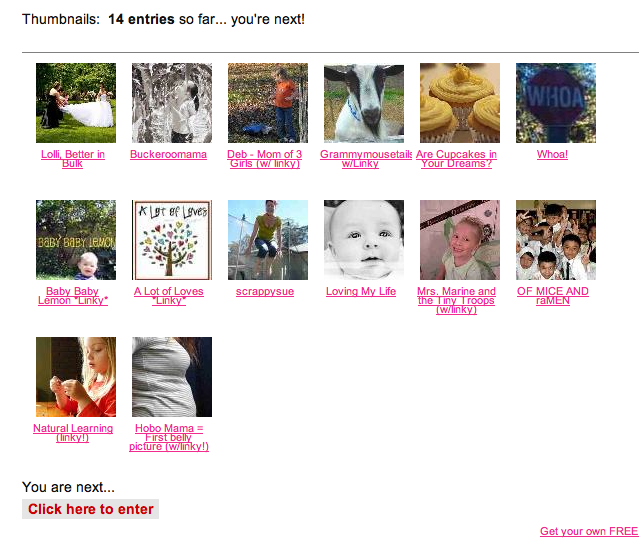
These above are 80 pixels in size with a balanced title length. (Again, click to see the image actual size.) Every title fits, although they're a little squishy vertically, which is presumably due to an interaction with the blog's template fonts and can't easily be altered (without altering the template, which seems like overkill for such a small problem).
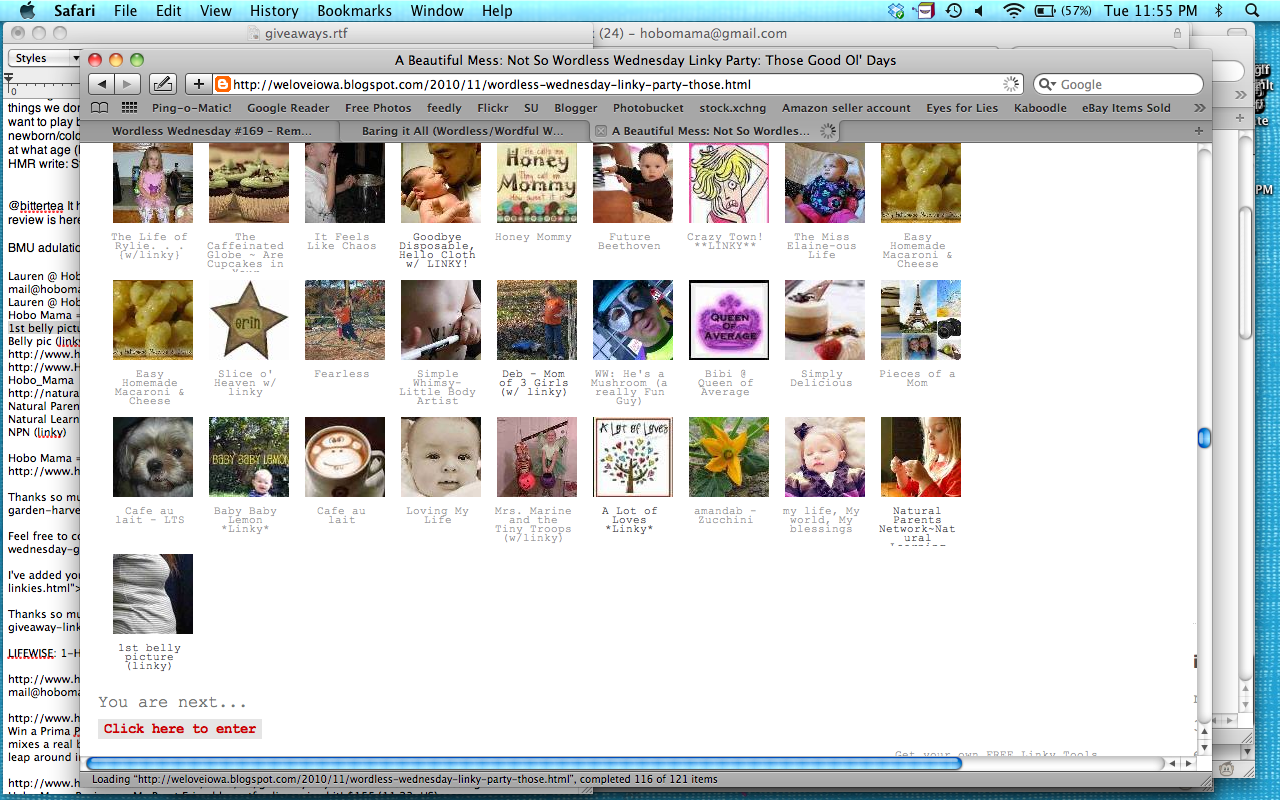
40 pixel size above (the smallest) with a character limit that's a little too big for the image width. Click on the image to view it actual size. You can see that the bottom right title for Natural Parents Network cuts off at the bottom. Even though it wasn't over the character limit, using that many characters exceeded the allowable display size. The 40 pixel size is petite, which makes images harder to see, but is useful for blogs that anticipate a lot of links and need a faster loading time.
So be sure to choose your image size and character length thoughtfully.
Grab the code:
Once you've chosen all your options, you can then save and create your linky. It will deposit you back onto the Dashboard, where you can get your code.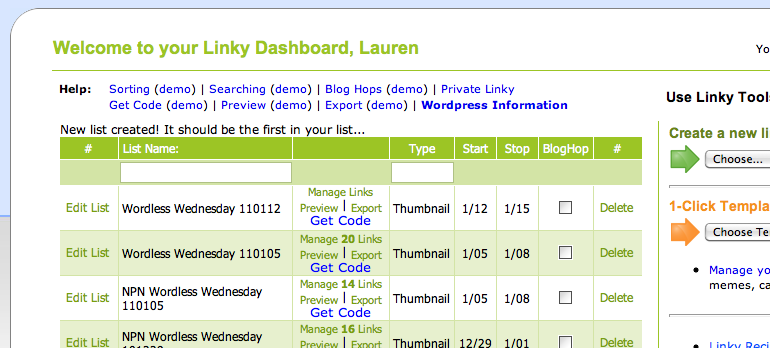
(Note that you can also Manage Links by deleting any that are objectionable and Edit List at the lefthand side to quickly change your options, such as thumbnail size, character limit, and duration.)
Once you click "Get Code," a box will pop up. One final warning: If your system is anything like mine, it will pop it up so that half the box (the relevant half for me, as it turns out) is hidden up past the top of my screen. I have to scroll up to see the full box, but that's what's needed.
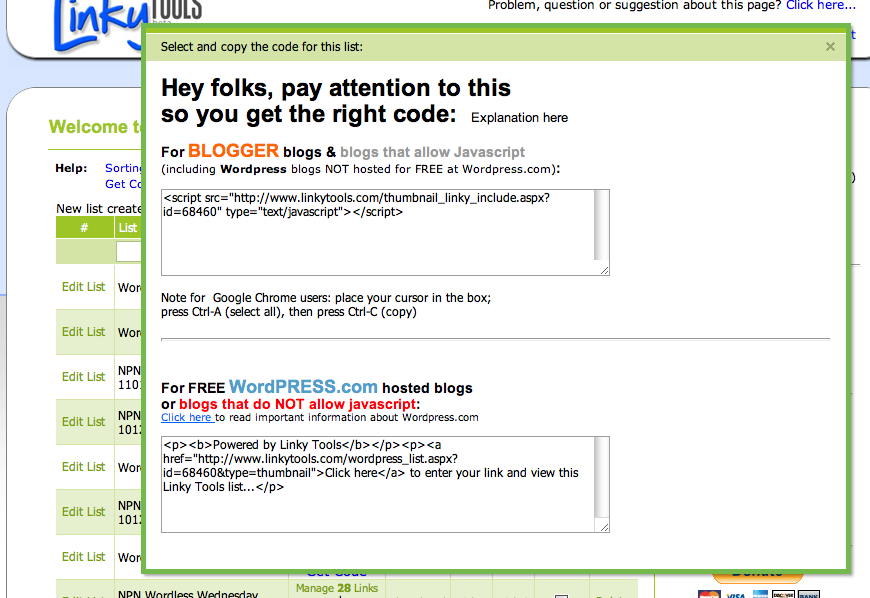
Blogger, self-hosted WordPress blogs, and other blogs that allow Javascript should use the top code. (That's most people, in other words.)
Blogs hosted for free at WordPress need to use the bottom code. WordPress-hosted blogs don't allow Javascript, so Linky Tools hosts the linky in a separate window off-site. This is for blogs ending in .wordpress.com. If that's you, go with the second option.
If that's not you, go with the first.
And that's all. Paste it into your blog post. (See here for how to paste HTML into Blogger and here for how to paste HTML into WordPress.)
Once you publish your post (assuming you didn't set your start date to the future), your cute little thumbnail linky will be live and ready to accept that first eager linker.
Enjoy!


1 comments:
Thanks for this tutorial Lauren. It was really helpful, and inspired my first Wordless Wednesday linky this week. :)
Post a Comment