
Here's my basic button code:
<div align="center"><a href="http://www.HoboMama.com" target="_blank" title="Hobo Mama"><img src="http://images.hobomama.com/hobo-mama-button-200x200.jpg" width="150" height="150" alt="Hobo Mama: A Natural Parenting Blog" /></a></div>
From the top down, here are the elements in my button code. You can feel free to copy what you like.
- I've chosen to center mine, which is the opening and closing div tags.
- Then I have a link to my website: <a href="http://www.HoboMama.com" target="_blank" title="Hobo Mama"> I've chosen target="_blank" so that it opens in a new window when someone clicks on it, and I put my website name in the title tag, so that anyone hovering a mouse over the image will see what page it links to. (You can try it on the top image to see what I mean.)
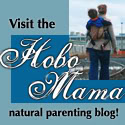
- Now it's time for the real point of this code, which is the image for the button itself: <img src="http://images.hobomama.com/hobo-mama-button-200x200.jpg" width="150" height="150" alt="Hobo Mama: A Natural Parenting Blog" />
- The src tag is where you put the direct link to your button. (I recommend
using Photobucket or[Photobucket no longer possible as of 2017] self-hosting the image, because you'll have some control over changing the file in the future if you ever want to alter the image without changing the button code.) - The width and height are how big you want your button to appear, and of course the people who grab your button can alter the size as they wish. A 125x125 is a good standard size. I made mine a little larger — for attention, I guess. You can see from the file name that the button image is actually 200x200, so that fans could make the button as large as that without degrading the quality. I recommend making your button image similarly a bit oversized in case of zealous fans!
- The alt tag lets you give your image a name, so that it will show up in search engine results. I recommend putting a good, brief description of your blog here. It will also help fans who have lots of buttons keep track of which one's yours when they're looking at the code alone.
- The src tag is where you put the direct link to your button. (I recommend
- Then make sure to close off all the tags you opened: </a></div>


4 comments:
Wow, this post was so helpful! I was familiar with the basic html stuff, but I didn't know about the target and title. I learned a lot. Thanks so much for sharing all this valuable information!
Oh my goodness gracious this blog post was helpful! I've been searching online for hours trying to work this out and you solved all my problems in a couple minutes! Thank you so much!
Chamonix
http://noimpactbride.com/
I knew how to show a button, but I totally appreciate the suggestion of hosting it where it will be easy to change later. Brilliant!
And 3 hours later I finally have a button! you directions are awesome I am just HTML illiterate! thank you and i have got grab my button text box to work!! woohooo
Post a Comment