Showing posts with label gmail. Show all posts

8.25.2013

Sunday Surf: Inbox cleaning made fun, infographics, & popularity contests

Links to share, from Writing Tidbits:

Email Management Made Fun | The Email Game

A game for Gmail that inspires you to clean out your inbox — FAST!
2 MONTHS AGO
gmail Email inbox inbox zero Time Management scheduling
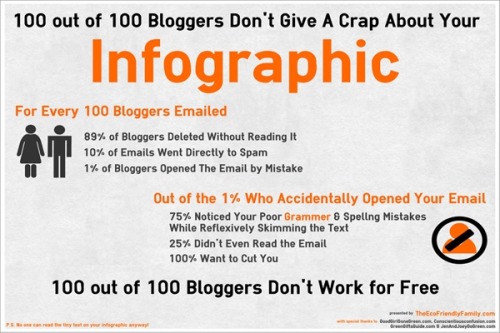
blogging spam pr infographics

Strocel.com | Reflections on Blogging Contests

Here’s the truth, in my experience: these contests typically go to the best networker. You’re not going to win by voting for yourself as many times as possible. You have to get other people to vote for you, and advocate for you. If you’re not comfortable promoting yourself in that way, that’s fine. Many of us aren’t. We don’t want to pester people. I sort of feel that way, myself. And now I know that’s why I’ve never won these contests. Knowing that, somehow, has allowed me to make my peace with it. …
Of course, there’s also nothing wrong with calling on your network for support. There’s nothing wrong with telling your community that you’re in this contest and you’d love for them to vote for you. There’s nothing wrong with putting it out there, and seeing what comes back. 
2 MONTHS AGO

6.30.2013

Sunday Surf: Take control of your to-do list & inbox, plus the truth about blogging conferences & safe FB sharing

Links to share, from Writing Tidbits:

BlogHer Tells WSJ the Rest of the Story About Blogging Business Trips - Elisa Camahort Page - Voices - AllThingsD

The answer is that the Journal has published the umpteenth article dismissing women who blog — even as we are using our expertise across social media not just to develop our own brands and businesses, but to symbiotically develop some of the hottest new companies in the startup economy (Pinterest, anyone?). MilitaryMoneyChica nails it in her post, “If Mom Bloggers Lean In Any More, They’ll Just Walk All Over Us. Thanks a Lot WSJ.”:
Let’s be honest. Do I have fun when I go to a blogging conference? Uh, yes. But I had fun when I went to conferences and professional development opportunities when I guess, according to this article, I had a “real job”…. Thanks for portraying my profession as a bunch of opportunistic, burnt-out moms who have to dress a vacation in business casual to get out of doing the laundry.
1 MONTH AGO
blogging blogging conferences conferences blogher women writers feminism sexism parenting
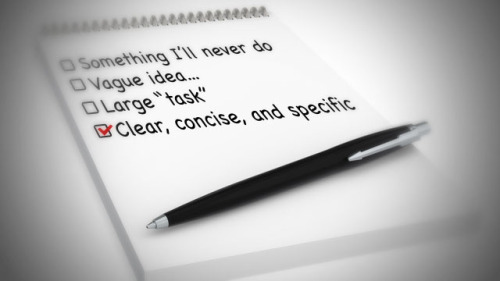
Brilliant article on How to Make Your To-Do List Doable:

When you’re wearing your Boss hat, it’s up to you to write down the instructions in such a way that your Assistant self can just do them without having to think - or stress. Taking the thinking out of the acting is one of the best ways to make your to-do list a cinch to finish off.
Brilliant article on 
When you’re wearing your Boss hat, it’s up to you to write down the instructions in such a way that your Assistant self can just do them without having to think - or stress. Taking the thinking out of the acting is one of the best ways to make your to-do list a cinch to finish off.
to-do list time management 1 note

4.01.2012

Gmail Tap for Android

At the tail end of April 1, I just have to share one of Google's videos this year:


2.17.2012

How to send from multiple email addresses in one Gmail account


You now know how to log into multiple Gmail accounts at once and forward other Gmail addresses to a single account.

The next step in our Gmail simplification program is to look like you're still responding to emails from multiple accounts, even though they're really all consolidated.

1. Go into your Gmail Settings.


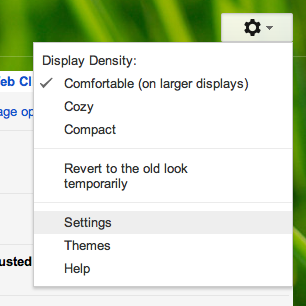
Click on the gear icon toward the upper righthand corner of your Gmail screen (located underneath your profile icon or name). In the drop-down menu that appears, select "Settings."

2. Go to "Send mail as" settings.

Click images to embiggen.

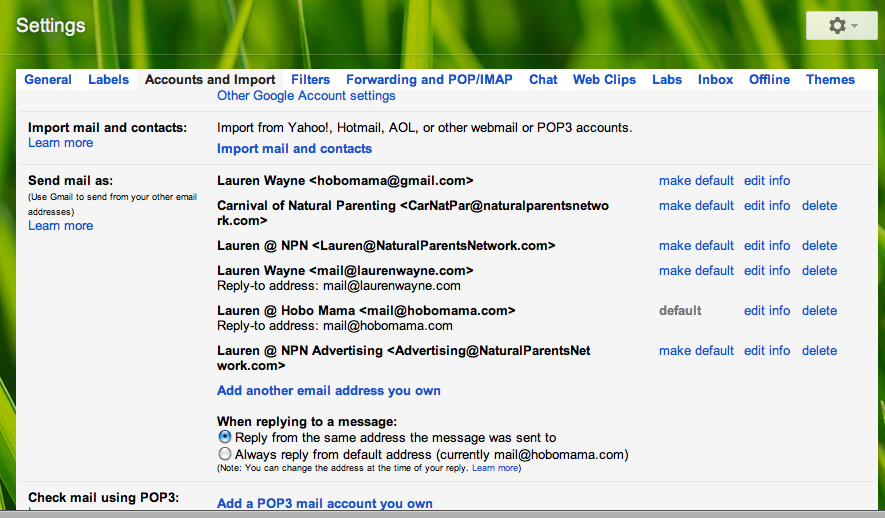
Select "Accounts and Import" along the top tabs in Settings.

Scroll to "Send mail as:" and select "Add another email address you own."

2.16.2012

How to forward email to another Gmail account

As I discussed in "How to log into multiple Google accounts," it is possible to have multiple Gmail windows open in the same browser.

However, it can be even easier for you to have all your Gmail come to a single account, assuming it's prudent to combine them.

For my needs, I have several Gmail addresses that I need to check that all relate to my blogging: my main hobomama Gmail account, mail forwarded from my personal domains (such as {at} LaurenWayne.com), and mail sent to various addresses {at} NaturalParentsNetwork.com (CarNatPar, Lauren, Advertising). Before combining these, I had to log into each Gmail account separately to read the messages, even though it's entirely appropriate to combine them all into a single account for the purposes of checking my inbox and sending replies.

(Note that I've kept my personal email separate, however. I figure that might lead to too much confusion, so I check it separately.)

Here's how you can check multiple Gmail accounts under one login:

1. Go to your Gmail settings of the account you do NOT want to log into from now on.


Click on the gear icon toward the upper righthand corner of your Gmail screen (located underneath your profile icon or name). In the drop-down menu that appears, select "Settings."

What I mean by "the account you do not want to log into" is, this is the account you'll be forwarding mail out of, to flow into the account you'd prefer to check. So right now, set up the forwarding in the reject account.


2. Configure your email forwarding FROM that account.

Click images to embiggen.

  • Select "Forwarding and POP/IMAP" from the tabs along the top of Settings.
  • Click "Add a forwarding address" and do so. It will send a confirmation code to the forwarding address, so now you have to log into that account to receive it.
  • Confirm the code with the first (reject) account. You can click the link in the email Gmail sent you, or there is a box on that same page that will read "Verify [email address]" with a box for the confirmation code. (Will all this require some logging in/out and back-and-forth? Perhaps, if you haven't enabled multiple log-in, or you're forwarding to a non-Gmail account. But it will save you time in the future, so keep on!)
  • Select "Forward a copy of incoming mail to," and the address you've confirmed should now be in your drop-down menu of forwarding addresses.
  • Choose what to do with mail forwarded out of this account. Do you want it kept in the inbox, marked as read, archived, or deleted? To keep things tidy but preserve copies in case I choose to separate the accounts in the future, I choose "archive Gmail's copy." What you choose here will affect only the emails as they exist in this account, not as they appear when forwarded. In other words, I selected "archive," but the forwarded emails still appear unread and in my inbox in the preferred account.

2.15.2012

How to log into multiple Google accounts


Two Gmail accounts open in the same browser simultaneously,
with no computers exploding


If you want to check multiple Gmail accounts or access (some) other Google accounts without logging in and out or opening a new browser, here's a tutorial to show you the easy way to handle this.

All you need to do is enable multiple sign-in and then sign in to each account, switching among them as needed.

1. Enable multiple sign-in for Google accounts within your web browser.

Go to https://accounts.google.com/b/0/MultipleSessions, select "On - Use multiple Google Accounts in the same web browser," and save.

2. Log into another account.


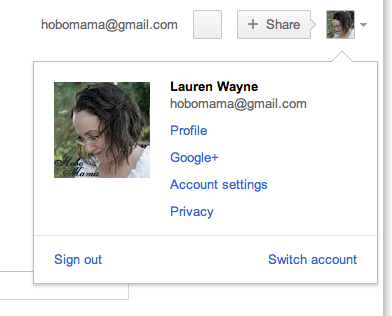
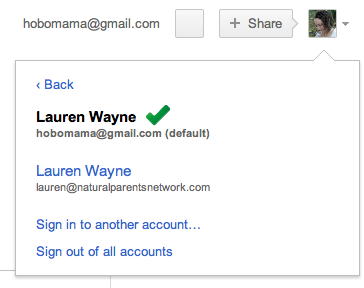
For most Google products, look in the top righthand corner to find a little down arrow next to your profile icon (if you have one) or your login email address. When you click the arrow, the drop-down menu above will appear. Click on "Switch account."


Presumably you will see yourself signed into only one account, marked "default." Click "Sign in to another account…" to do just that.

3.14.2011

How to purge your email inbox


I am NOT an expert on reducing email clutter and controlling what comes in each day. Best to start with a caveat. That said, I recently cleared my personal Gmail account from over 2,000 unread messages (you read that correctly) to 42.


Here are a few of the tips and tricks that I sometimes follow to help me keep a handle on inbox overload (some of which I should really attend to more often!).

9.06.2010

New rich-text signatures in Gmail

Just as a short update to my post on creating HTML signatures in Gmail:

Gmail has finally released a long-awaited function for creating a signature in rich text format.


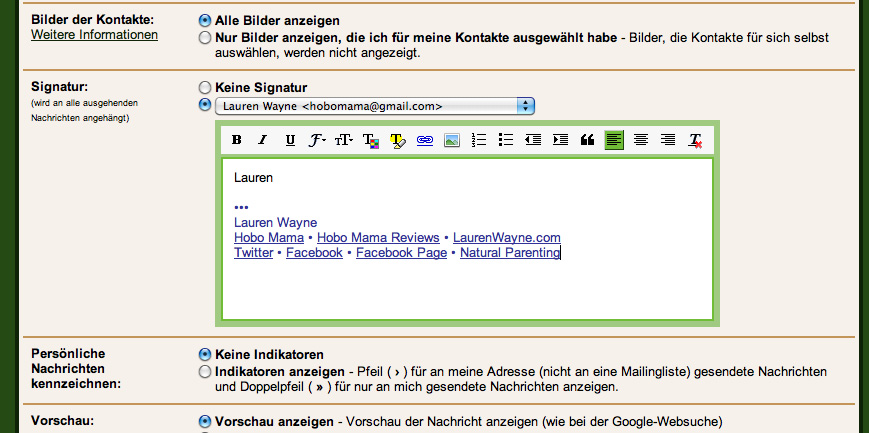
Click the image to see it bigger. Ignore that it's in German. That's a quirk of mine.

This screen is in Settings in Gmail (which you can reach by clicking the link in the top right corner). The box where my signature is is where you paste in or craft your own signature, and the rich-text icons allow you to control and customize font styles, colors, sizes, and alignment, or to add lists, links, and images.


So that should be easier, all around! I just pasted my previous HTML signature into the rich-text box, and it transferred perfectly. You could also build one from scratch, and you can include URLs and images as you wish, so you can link to your website or social media pages and include an avatar or business logo.

You can even have a different signature for each reply-to address, so if you wanted to have a personal signature and a business signature, that's possible. Or if you run separate businesses (such as a blog and a store), you might have one signature that goes to readers and one that goes to customers. As an author, you could include an image of your book cover and a link to the Amazon buying page.

There's really no downside to having a simple but effective signature. I encourage you to take advantage of the signature function, and personalize the emails your readers receive. Thanks to Gmail for realizing rich-text was the next (overdue) step forward!

3.07.2010

HTML signatures in Gmail: An easy how-to

Update, September 2010: Gmail has finally unveiled a rich-text signature function that replaces this method, though you can still read on for benefits and tips of creating an email signature.


I've been wanting an HTML signature in rich text for my Gmail account for when I send business emails, so I can promote my websites, Twitter account, and Facebook pages — but all in a streamlined and attractive manner.

Gmail doesn't currently support rich text or html formatting in the sig box, which is on the Settings page.

Here was the best I could do in plain text:
~*~
Lauren Wayne

www.HoboMama.com
www.HoboMamaReviews.com
www.LaurenWayne.com

www.Twitter.com/Hobo_Mama
www.Facebook.com/HoboMama
www.facebook.com/pages/Hobo-Mama/322453825286

Unwieldy, isn't it?

I don't like how lengthy the Facebook URLs are, and I don't like that the sig as a whole is a whopping 10 lines long. For Gmail to automatically parse the html, I had to keep at least the "www" part intact, which meant I had to use a plain URL rather than just, say, a blog name (www.HoboMama.com vs. Hobo Mama or HoboMama.com).

So, since I didn't like that, what did I like? Well, here's what I ended up with, using my super-cool and sneaky method:
•••
Lauren Wayne
Hobo MamaHobo Mama ReviewsLaurenWayne.com
TwitterFacebookFacebook Page

And here, my friends, is how I got there:

First of all, you need a place to edit your html. If you know how to hand-code html and preview it online, go to it. I found the easiest way in a WYSIWYG sort of way was to use a Blogger account. For my purposes, I used my standard Hobo Mama account.

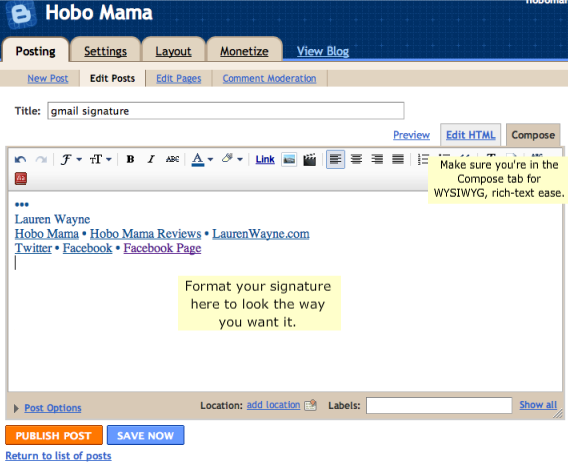
  1. In Blogger/Blogspot, create a new post. You can title it "gmail signature" or something else memorable in case you want to come back to it. You won't be publishing it, just saving it as a draft, and you can always delete it after you're done tweaking your signature if you want to keep your account clean.
  2. Click on the Compose tab. Type in your signature as you want it to look. Use the Link function to add URLs to keywords. Change fonts and colors as you wish. You can add in special characters like bullets. You could even add images, such as a company logo. In fact, you could make your whole signature just one big image if you'd rather and know how to edit image files.
  3. Copy the finished signature.


(Click on images to see them bigger.)

All right, now we head over to Gmail. As I said, you can't use any html or rich-text formatting in the signature box, so we'll skip that box. You could simply copy and paste your signature into each email individually, but that's cumbersome. The method I came up with isn't as easy as having a traditional signature, but it takes only a second or two each time you compose an email and it uses the Canned Responses feature in Gmail Labs.

  1. Go to Settings in Gmail (top right corner).
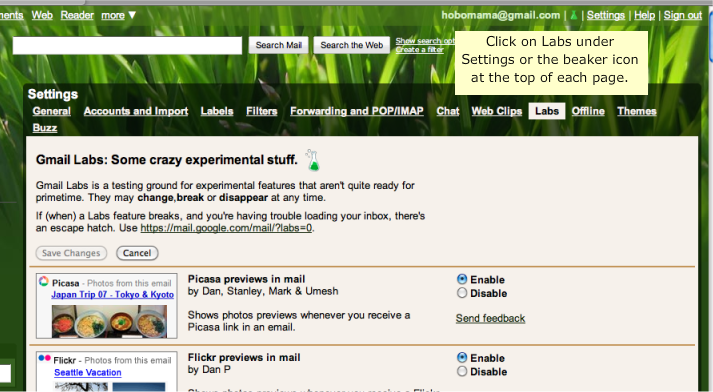
  2. Click Labs along the top tabs.
  3. Scroll down or do a search for Canned Responses and select Enable next to it (yes, "email for the truly lazy"). At the top or bottom of the Labs page, click Save Changes.
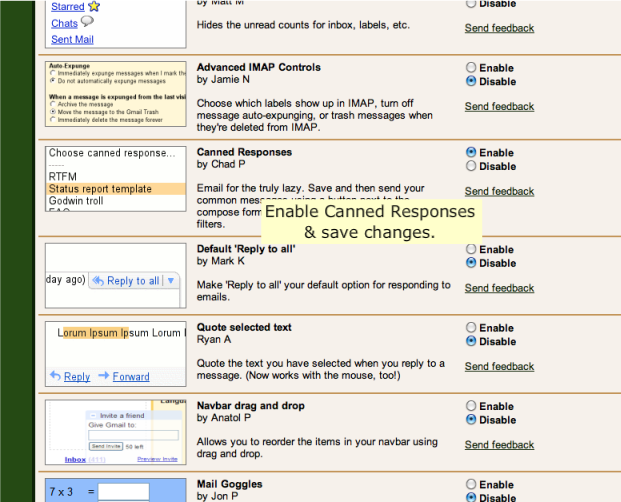
  4. Now click on Compose Mail. Make sure you've selected Rich Text as your messaging view. Paste your signature into the message box. It should paste exactly as you had it formatted in the Blogger box. You can change the font or layout further using Gmail's rich-text editing.
  5. As an optional extra, if your signature font is formatted in a way unlike the way you would like your message to be (for instance, my signature is in blue, but I prefer my message font to be in black), add in a simple line of text above your signature that you usually use to start a message. In my case, I added "Hi!" I formatted "Hi!" in my preferred black message font. [ETA: I just realized what would be even easier and more convenient would be to add how you usually CLOSE your emails, such as your name!]
  6. Now that you've enabled Canned Responses, there should be a line that says Canned Responses just above your message box. Click on Canned Responses and select Save --> New canned response... A box will pop up and ask you for a name to save it under; you can choose something like "business signature."
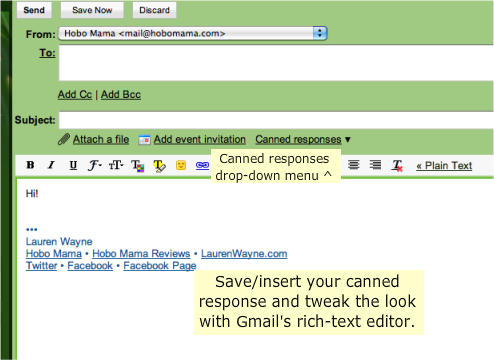
  7. Now you can Discard your draft message.
  8. Next time you go to email someone, either through Compose or Reply, click on Canned Responses --> Insert [business signature or whatever you called it].
  9. Voila! Your signature appears. You can tweak it in the message box if you'd like, or go back to Blogger to do major revamps. If you want to save a change, simply click on Canned Responses --> Save --> [business signature] again, and OK the warning that pops up that you're saving over a saved canned response.


I know this method isn't quite as convenient as having a signature automatically appear whenever you click Compose, but it's the most streamlined way I could find for now!

The good news is this method lets you choose which messages you want to put a signature on. You could even have multiple signatures, such as a personal one and a business one, and choose which signature you want each recipient to see. You could put your address and contact info in emails you send to publishers, for instance, but your URLs alone for emails to colleagues, just saving each signature under a different name.

Hope this tutorial helped you! Let me know, or give me your own tips.
Related Posts Plugin for WordPress, Blogger...