Showing posts with label publishing tutorials. Show all posts

6.29.2010

"Usernames must be at least 5 characters long" Facebook bug for custom URLs

If you've been getting this obnoxious error message —

"Usernames must be at least
5 characters long"


— when you're trying to set your Facebook custom URL, you're not alone.

I was having this problem lately. After much thought, trial and error while typing in possibilities, and a public opinion poll, I had decided on the custom URL for my Hobo Mama page: http://www.facebook.com/HoboMamaBlog

I toddled off to the Facebook link to claim my URL — http://www.facebook.com/username — which works both for personal Facebook pages and for business/blog/etc. fan pages.

I typed my choice into the little box and hit "Check availability." And, um … no. Facebook scolded me with an incomprehensible message: "Usernames must be at least 5 characters long."

HoboMamaBlog, I read. HoboMamaBlog. I stared at it. I squinted. Yes, even without all the bother of actual counting, that sucker was definitely over 5 characters.

Well, good old Google to the rescue.

I found this Hubspot blog post by Ellie Mirman: "How to Create a Facebook Page Vanity URL." Ellie in the post did not explain the error and offer a workaround — but Ellie in the comments section helpfully did!

Piecing Ellie's advice together with some advice I found on a Facebook forum that I for some reason can't locate at the moment, I played around with entering my name, erasing it, clicking "Check availability" while there was nothing in the box, then typing it in again. It still took a few tries, but eventually: It took! I have my new Facebook page URL!1

So, basically, it's a known bug. Facebook is aware of the issue (I'm told), but so far this is the best workaround.

Assuming you don't yet have a Facebook custom URL, here are the details on how to get one:

First, the why: It's easier! You can tell people to find you on Facebook by saying, "Go to Facebook slash HoboMamaBlog." Rather than saying, "Go to facebook.com/pages/Hobo-Mama/322453825286." Oof, what a mouthful! The former also fits better on business or calling cards, darling. And, you know, why not? It's fun; it's cute; it shows you care.

So you want one? Good.

Where: Go to http://www.facebook.com/username.


You can click on images to see them bigger.


Personal first: You will have to set a personal user name first if you don't already have one before setting any for your pages. My personal Facebook name is http://www.facebook.com/hobomama (and feel free to friend me if you like). As you can see, I "stole" hobomama from myself so it was no longer available when I wanted it for my blog's Facebook page, which meant I belatedly had to come up with something else.

Permanence: Do think long and hard about what you want your permanent URLs to be, for all your Facebook profiles and pages, because so far Facebook is being hard-nosed about allowing changes to usernames. Basically, you can change your personal one once. You cannot change your business (page) ones. You cannot transfer a username to or from someone else. (So on that note, triple check your spelling, too!)

Eligibility: All verified Facebook accounts are allowed to set a personal username. Fan pages, however, must have 25 fans before you can set a username for a fan page.2 (This is to prevent name squatting.)

What's in a name:
  • Usernames can only contain alphanumeric characters (A-Z, 0-9) or a period ("."). I was kind of bummed that no other punctuation was allowed, such as an underscore. If you use a period for your own aesthetic sensibilities, know that it does not make your username unique from the same name without the period(s). That is, "hobo.mama" is considered the same as "hobomama." I did check, thanks to Toni Lamn's suggestion.
  • Usernames must be at least 5 characters long. Har har har. But it's true. "HM" wouldn't fly.
  • You can't claim someone else's username. (Duh.)
  • You can't claim a copyrighted username — or you might be able to, but Facebook can then take it away if a rights holder complains. So even if your last name is McDonald and you're managing your family fan page, don't bother registering "mcdonalds" as your username.
  • "Certain words" are not allowed. I think we can all guess what might be on that list. But, really, do you want your mother to see such a username? Shame on you for even considering it. Unless you're not Facebook friends with your mom. Then it might sort of rock.
  • You're also not allowed to use super generic words like "pizza" or "flowers," to prevent (again) people from squatting on popular SEO terms.

How: Type in your username and click "Check availability." If you get the infamous "5 characters" error and your username is, in fact, more than 5 characters, then backspace, click "Check availability" anyway, then type again. Rinse, repeat. Hopefully one of those times Facebook will obey and let you go through with the process. You'll get a big warning that this will go on your permanent record. If you are happy with same, go ahead and confirm. Congratulations! You have a personal username, i.e., custom URL with Facebook.


Down to business: So, if you have a Facebook fan (er, "like") page and want a username for that one (or multiple pages), then you just go back to the same link — http://www.facebook.com/username — and start again.
  • Click "Set a username for your Pages" underneath the yellow box telling you your personal username has already been set.
  • You'll see a drop-down menu with all the pages where you're an administrator. Select the one you want.
  • The same rules for usernames as above apply.
  • The same error might also apply, so use the delete-and-click workaround.
  • Remember the important differences between fan page usernames and personal:
    • You need at least 25 people "liking" your page before you're allowed to set a name.
    • The name you choose will be permanent. Full stop.
  • Once you're ready, click to confirm.
That's it! Now you should be the owner of a brand-new Facebook Page custom URL. If you have multiple pages, just repeat the process again.

More info can be found in the Facebook help section on the subject.

Enjoy! And visit me. And like me! I'm nice.

http://www.facebook.com/pages/Lauren-Wayne-author/104277789602502?ref=ts (sigh — so long, so ugly)
http://www.facebook.com/HoboMamaBlog
http://www.facebook.com/CarNatPar
(I set that one, too, while I was at it.)


Thanks again to Ellie for posting the workaround!


1 I only have a custom URL so far for my Hobo Mama page, because my Lauren Wayne page is soooo lonely that I do not as yet qualify for one. Anyone want to "like" me there? Anyone?
2 Did I mention I need more fans? I need more fans.


4.24.2010

Switch between Seller Central and Search Inside This Book on Amazon

Some time ago, I expressed my dismay over the apparent way Seller Central accounts and the Search Inside This Book feature on Amazon were linked. It seemed that signing up for Search Inside This Book had made my (defunct) Seller Central account disappear — when I logged in to Amazon Seller Central, it now defaulted to my publisher interface, and I couldn't figure out how to access my Amazon Marketplace account.

Well, they say a tax audit is the mother of figuring things out. Or something like that. We were audited by the state of Washington, and I had to get into my old Seller Central account to prove some income, and — wouldn't you know it — there is a way. It's just in teensy-tiny-font form.

Here are some screen shots, in case you're as near-sighted and unobservant as I am. You can click on any of the pictures to make them larger.


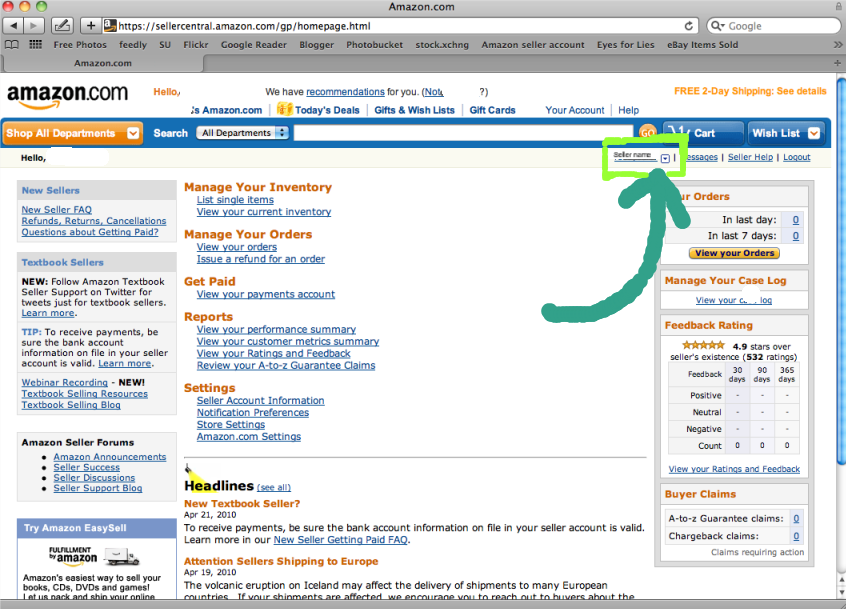
If you're in Amazon Seller Central, there's a little down arrow next to your seller name toward the top of the page. Yes, my seller name was Seller name. Ok, not really.


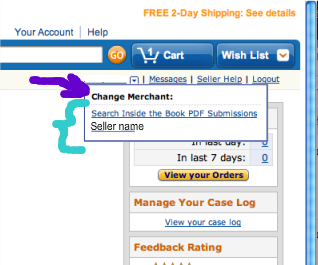
If you click on the little arrow or your seller name, down drops a little menu that lets you toggle between the two interfaces. Ah! Choose "Search Inside the Book PDF Submissions" to get to your publisher account. See how it says "Change Merchant" but only after you've clicked on the little arrow? So helpful.


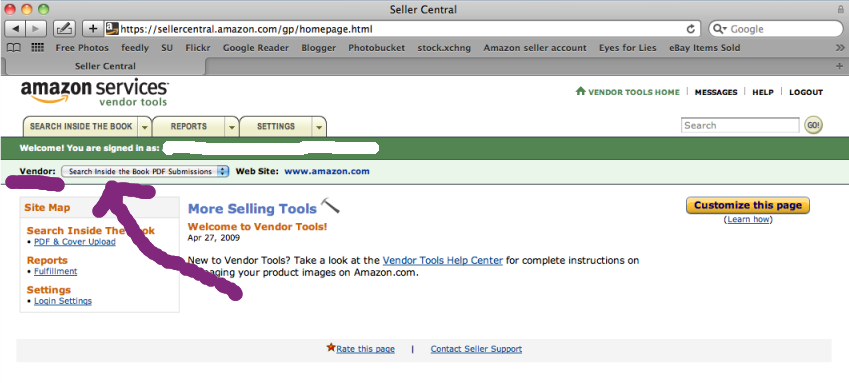
This is the view from within the publisher interface, Amazon Vendor Tools and the Search Inside The Book PDF Submissions area. Up in the toppish left corner is the word "Vendor" (which apparently was supposed to mean something to me) next to a drop-down menu.


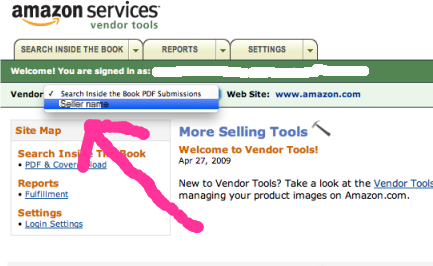
And that's how you get back to Seller Central, by clicking on your seller name again. Ta da!


To sum up, you can have both a Seller Central / Amazon Marketplace account and an Amazon Vendor Tools / Publisher / Search Inside This Book account. No worries, no problems — I just wish Amazon had made that drop-down menu a little more obvious!

4.06.2010

Convert your time zone for deadlines

Dionna of Code Name: Mama and I are writing a few blogging tutorials of particular use for our Carnival of Natural Parenting participants. This one will help in making sure you get your carnival submission in by the right time, no matter where in the world you live!


All right, this is probably one of the lighter tutorials for our carnival participants, but it does come up every month, and I might as well have a blog post to point people to.

All the writers outside of the Pacific time zone I set the deadline for want to know: When is the article due in their time?

This tutorial can also help anyone who's writing for an editor across time-zone lines or entering a contest with a firm deadline.

Submissions for the Carnival of Natural Parenting are due by 11:59 p.m. Pacific time. Now, I'm not encouraging anyone to wait until the very last second to turn their entries in (although I generally do just that), but it's good to know the latest you can click "send" on the email, isn't it?

But if you live nowhere near Pacific time and can't do the math in your head:

You need a time zone converter.


Here's one:

World Time Server


The top line is showing you 11:45 p.m. (Daylight Saving Time) for Pacific time, the time zone I chose, because I live in Seattle. I wanted as much time as possible to turn in my article. I'm like that.

Find your own country, city, or state in the drop-down menu where it says "In."

Voila! Now you know what your actual deadline is.

Here's a cheat sheet for some of our most common entry time zones, adjusted for 11:59 p.m. PDT. If I say "next day," that means that time on the date after the stated carnival due date (for this carnival, then, April 7).

Time Zone Adjusted Time
Hawaii Time 8:59 p.m.
Alaska Aleutian Time 9:59 p.m.
Alaska Time 10:59 p.m.
Pacific Time 11:59 p.m.
Mountain Time 12:59 a.m. (next day)
Central Time 1:59 a.m. (next day)
Eastern Time 2:59 a.m. (next day)
Atlantic Time 3:59 a.m. (next day)
Western Africa Time 6:59 a.m. (next day)
Greenwich Mean Time 7:59 a.m. (next day)
Central European Time 8:59 a.m. (next day)
Eastern European Time 9:59 a.m. (next day)
India Standard Time 12:29 p.m. (next day)
Western Australia 2:59 p.m. (next day)
Japan Standard Time 3:59 p.m. (next day)
Australia New South Wales Time 4:59 p.m. (next day)
New Zealand Time 6:59 p.m. (next day)

What time zones am I forgetting? I'll add places if you leave a comment with a request.

Hope that helps you as you plan your procrastination!

April 11, ETA: I realized you might like a chart for Eastern time as well, since some of our Carnival day deadlines are in Eastern. Here you go, a conversion of noon EDT!

Time Zone Adjusted Time
Hawaii Time 6:00 a.m.
Alaska Aleutian Time 7:00 a.m.
Alaska Time 8:00 a.m.
Pacific Time 9:00 a.m.
Mountain Time 10:00 a.m.
Central Time 11:00 a.m.
Eastern Time 12:00 p.m.
Atlantic Time 1:00 p.m.
Western Africa Time 4:00 p.m.
Greenwich Mean Time 5:00 p.m.
Central European Time 6:00 p.m.
Eastern European Time 7:00 p.m.
India Standard Time 9:30 p.m.
Western Australia 12:00 a.m. (next day)
Japan Standard Time 1:00 a.m. (next day)
Australia New South Wales Time 2:00 a.m. (next day)
New Zealand Time 4:00 a.m. (next day)

P.S. A Facebook comment from mamamilkers said about this post: "I think you made have just taken nerd to the nth degree ;)" I'll take that as a compliment...

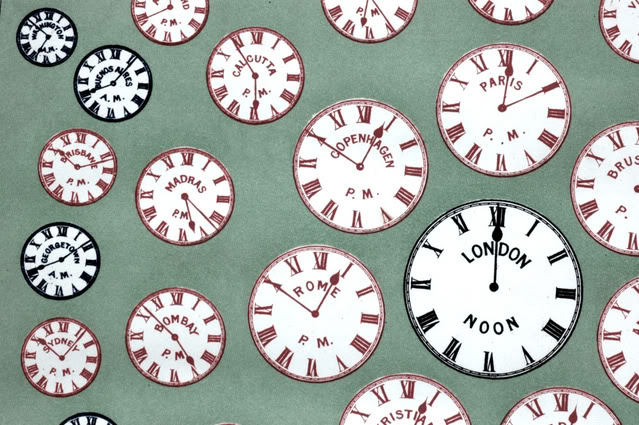
Photo copyright © Jenny Rollo, who lives on Australia NSW Time

3.25.2010

Create a Facebook landing page for new fans

I was wondering how companies and blogs had sweet landing pages, and now I know!

If you don't know what a Facebook landing page is — and you have a blog or website or product or company or whatever you're promoting with a Facebook fan page — then you need to find out and get yourself one!

It's an html page that shows up whenever a potential fan clicks on your Facebook page link.

It's a way to give a quick snapshot of who you are and what you do, or to showcase a special deal or current offer.
  • If you're an author, you could put up an image of your latest book cover and invite people to click through and buy, or sign up for your blog.
  • If you're a blogger, you could tell potential fans what you like to write about and how they can get in touch.
  • If you're a store, you could highlight a current coupon code or the season's new line.
  • If you're a business, you could put up your mission statement and contact information.

Want to see some landing pages in action?


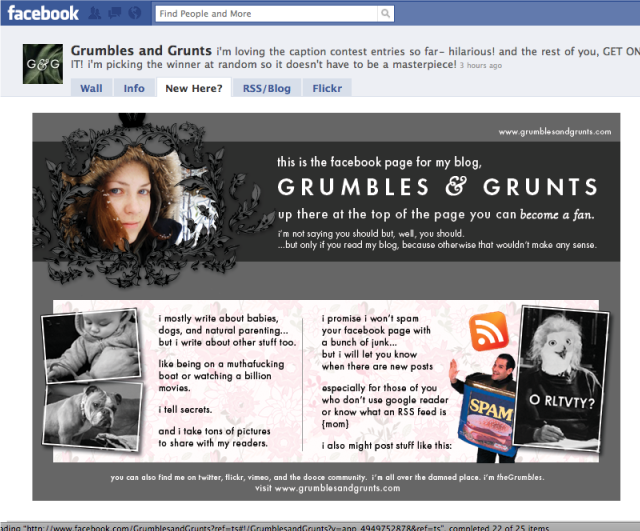
Love love love the Grumbles & Grunts one (of the Grumbles & Grunts blog), and that's what first inspired me to find out what a landing page was and how I could get me some of that action!


I want mine to look pretty like that sometime.

Other examples:


If anyone can come up with some more natural parenting-friendly examples, please leave the link. I seriously had so much trouble finding anyone I know who has a landing page, so I'm glad I'm getting the word out! :)

How to make a landing page


I don't want to reinvent the wheel. Do what I did — follow this Mashable tutorial:

HOW TO: Build a Facebook Landing Page for Your Business


Easy as pie. The how-to is 4 steps long, and it was very clear-cut.

Testing your landing page


If you're anything like me and you try to preview the functionality of a visitor clicking on your link and finding the landing page — you will be disappointed. I say this because I assume you are your own fan? (If not, why not?)

Once you're a fan, you will no longer see the landing page as the default view when coming upon a Facebook page. It will instead default to the Wall tab. If you couldn't see some of the examples I put in the example list, for instance, it's probably because you're a fan of those sites.

But you can still check the html by clicking on the tab at the top of your fan page. You can also log out of Facebook and then surf to your Facebook page to make sure the landing page is what shows as the default view for non-fans.

Wanna see my landing page?


I don't yet have a public LaurenWayne.com Facebook page because it just now occurred to me to make one.

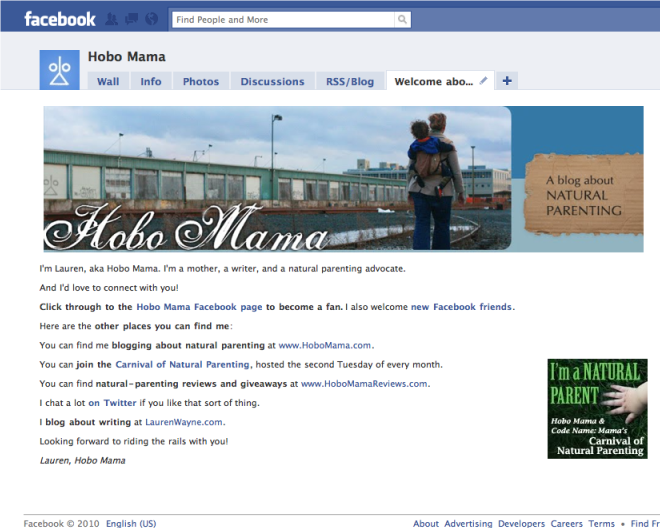
But here's my current Hobo Mama landing page.


I'd like to make it more sophisticated at some point, but it will do for now, to give visitors a quick intro to my blogs and all the ways to connect with me!

[ETA: All right, I made a Lauren Wayne Facebook page but it doesn't have a landing page yet... Feel free to fan me, and you can see any updates in the future!]

Share your landing pages in the comments. I'd love to make new Facebook friends.

3.18.2010

How to make your blog into a book

I'm writing a post at HoboMama.com about using this year's CreateSpace coupon for a free proof copy of a print-on-demand book, due to my NaNoWriMo win.

I say in that post that what I don't think would be feasible, in my case, is simply to reprint Hobo Mama as is and have it make a decent book. It's just ... too bloggy.

But some of you out there might have the perfect blogs to self-publish.


Maybe you run a recipe blog, a photo blog, an essay blog, etc., with a strongly unified theme and timeless content.

Or maybe you have relatives or friends who don't (won't, can't) get online but would read a bound copy of your blog.

Or maybe you want a copy for posterity, such as if your blog records your baby's first year.

Or maybe you just want to see yourself in (hard-copy) print!

Whatever your reasons, there are several possibilities for publishing a copy of your blog into an ebook or print book.

Scary Mommy gives you an idea of what such a book might look like. (Answer: Fabulous!)

Print directly from your blog

Blog2Print


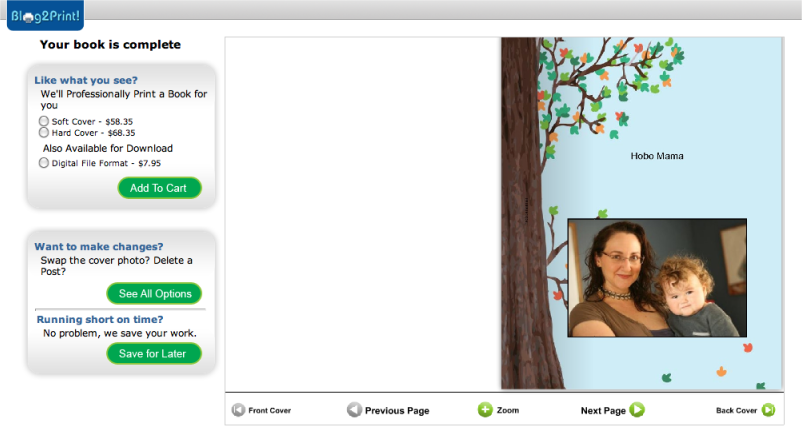
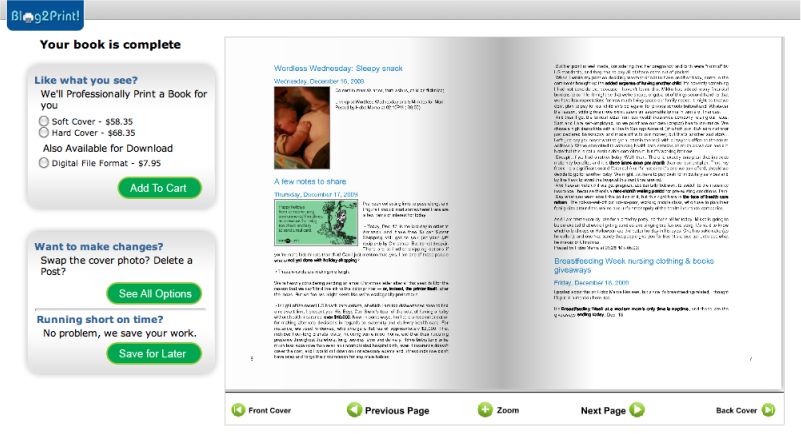
I first had my eye caught by an ad on Blogger for Blog2Print, which is compatible with Blogger, Wordpress, and Typepad. Prices start at $14.95 for a 20-page softcover, or $7.95 for a PDF ebook. (Note that 20 pages is not very many! When I selected a 3-month range, it came in at 142 pages without comments and my quote was $58.35 for softcover and $68.35 for hardcover. Apparently I am very wordy.)

You choose what date range of posts to include and whether to include comments. If you at all anticipate including (any) comments, I would suggest choosing to include them at first. Once you register for an account (free), you can go through each individual post and select which comments you don't want included.

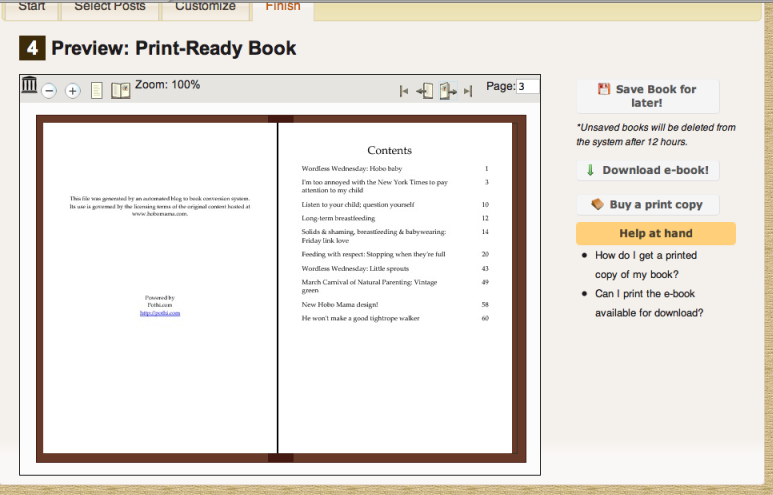
Once you have an account, you can also swap out images both on the covers and in individual posts, and  you can choose what posts to include or discard. This would come in especially handy if you want to collect only posts on a specific topic (say, all your craft tutorials) for a theme book.


You can also add in your own custom pages, placing photos or text or a combination of the two.

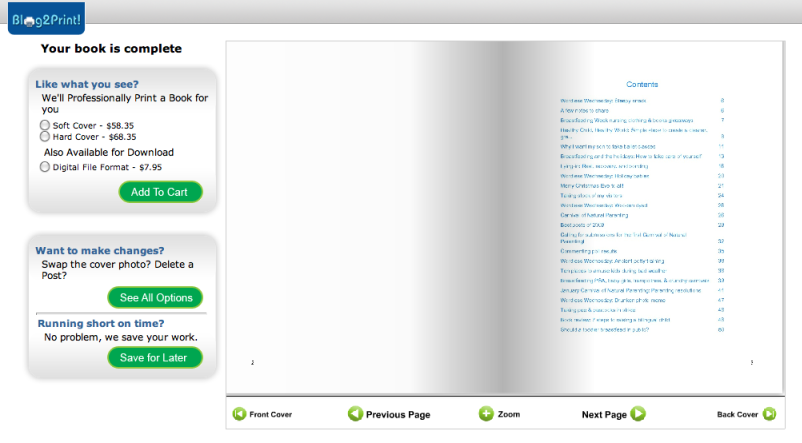
A table of contents is automatically designed for you from your post titles, which is convenient.


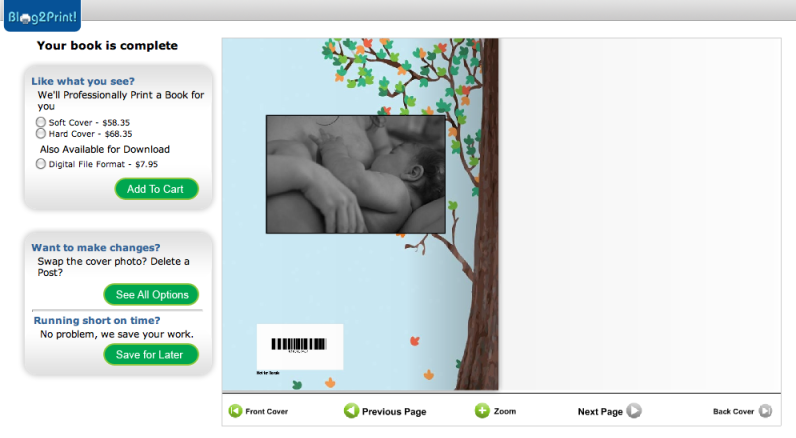
There are a small selection of cover designs available you can choose from. I wish there were a feature to design your own cover, because I feel like there isn't a very broad selection of professional and elegant covers available. You can choose what photos go on the front and back covers. You also get to edit a dedication. Now's your chance to thank your producer!


Blog2Print also seems to be adding a separate page for copyright/advertising purposes.

I can't vouch for the print quality or turnaround time. Anyone with experience, feel free to chime in!


Blurb

Blurb is what Scary Mommy used for her book. It has since been opened up to all typical blogging platforms: Blogger, LiveJournal, TypePad, and WordPress. It looks like you can "slurp" your blog's photos and posts directly into a layout.

There are a lot more customizations available with Blurb. For instance, you can choose which size book you want, and the prices look reasonable. You can also choose to have a dust jacket for a hardcover, and you can upgrade to premium interior paper.

You have to download the Booksmart software to import your blog to make a book, so I haven't tried that yet (considering I'm not actually going to be using it and all ...). The software is compatible for PC and Mac.

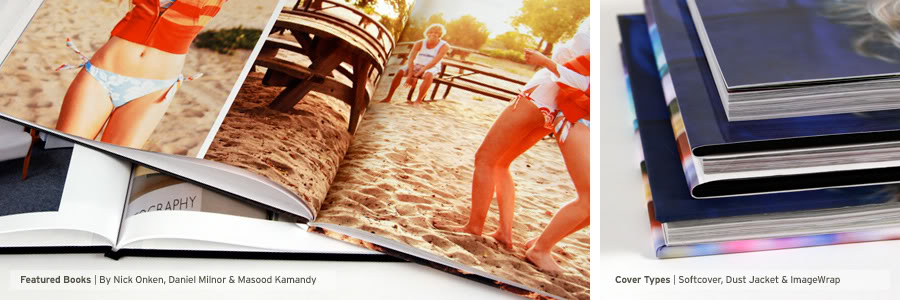
Read reviews to see what users think of the print quality. At any rate, I like how sophisticated the sample books look:


And this is really random, but I know Nick Onken, whose photos I believe those are. And I'm inclined to think that if he's satisfied with Blurb that it must be pretty spiffy.


FastPencil

Matt Cutts reviewed a few blog-to-book options and had the most success with Fast Pencil. (Scroll down that page to see "Turn Your Blog into a Book (Blog-to-book import).")

Matt recommends uploading several smaller chunks of your book, since otherwise it will be too large for FastPencil to import.

Matt says that images imported but not all html coding, and not embedded items such as polls and videos. There will still be editing to do, then, after you've imported, unless your blog is super simple.

Says Matt Cutts:
But all in all, I was impressed with FastPencil. They also have nice collaboration tools (e.g. you can designate editors, reviewers, co-authors, and project managers to help in writing/polishing the content). The site also works through your web browser instead of as a downloadable program, which appealed to me.


Print from a PDF of your blog

The other option for printing your blog requires an extra step or two but enables you to use pretty much any print-on-demand publisher (including CreateSpace, Lulu, CafePress, etc.). You use a service (or your own tech know-how) to convert your blog into a PDF, and then you use that PDF to publish your book.

Your blog is stored and can be exported as an XML file. What is an XML file? I have no earthly idea.

But here's how to export your XML file in Blogger, and here's how in WordPress. Here's a tutorial for LiveJournal, but ignore the steps that import it into Blogger.

It's that XML file that needs to be converted to a PDF, and there are several possibilities of XML-to-PDF converters out there, though I frankly wish there even more.

BlogBooker

(for Blogger and WordPress) — I couldn't get this to work for me, possibly because I asked for too many posts at once. Unfortunately, there's no way in Blogger to specify a date range for exporting. All I can think would be to edit the XML file directly and cut it down into chunks. When I tried to upload my whole blog, BlogBooker told me my XML file had errors but not what those errors were. When I tried to follow the directions in the FAQ, well, I still don't see any errors. Not that I'd know what to look for in the first place!

LJBook

(for LiveJournal) — same company as above, but for LiveJournal

Blog2Book

(for Blogger and WordPress) — PDF failed when I tried to do too many posts at once. Notice a pattern here? But if it works (and it did for me once I selected only my past 10 posts), you can select which posts to include and arrange them in your preferred order if chronological isn't cutting it for you. You can also choose to publish images or not. You can add a preface and dedication and specify an author name and subtitle.

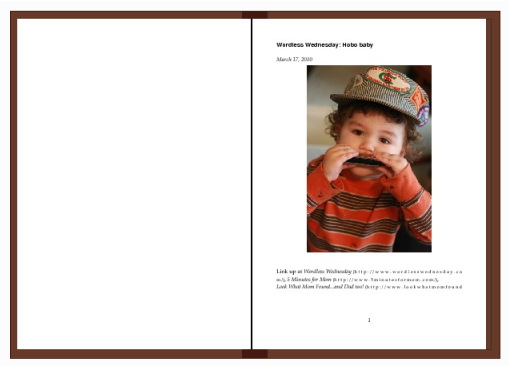
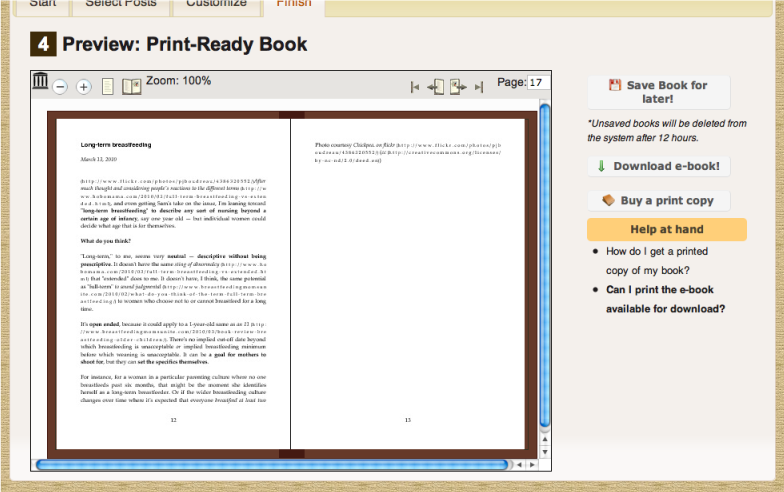
It starts each post on a new page, which can leave some pages looking a little bare with only one or two ending lines:

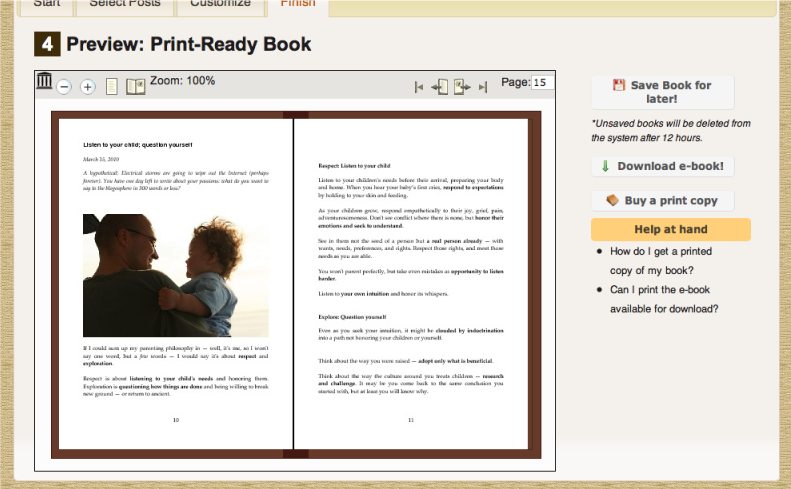
It will transfer a maximum of one (the first) image per post, looks like.

Blog2Book has a tiny selection of cover designs available, so I imagine you'll want to remove the cover entirely and design a new one at the print-on-demand publisher.

Unfortunately, I think you'll need access to PDF editing software to do that, but maybe the POD publisher can help you out.

WPTEX

This is theoretically something WordPress users can use to make a PDF from XML. Don't ask me.

Packt Publishing: Converting XML to PDF

And if you're seriously tech-savvy, code the PDF yourself. I am not that tech-savvy. I don't know why I find it confusing. Here's the layout of the steps involved: "This process will include setting the environment, converting the XML document to XSL-FO, parsing the XML document which further explains generating XSL-FO document, after which we finally move to converting the XSL-FO document to a PDF document." Well, duh, it's all pretty straightforward.

    Once you've successfully made a PDF of your blog, you can print the PDF of your blog at any self-publishing or print-on-demand publisher (or at a traditional publisher, honestly) that will accept a PDF. Options include CreateSpace, Lulu, Blurb, CafePress, and Lightning Source.


    If you know of other options for printing your blog into a book, please let me know. And please leave a comment if you've published your blog as a book and what worked for you!

    10.18.2009

    Seller Central account for Search Inside This Book

    Follow-up / solution / oh-duh-now-I-get-it here: http://www.laurenwayne.com/2010/04/switch-between-seller-central-and.html. Basically, ignore all of the following.


    Just as a follow-up to my last post on Search Inside This Book, I mentioned that you need a Seller Central account to sign up. I already had one, so I just switched my log-in email over to the one I'd given to Search Inside This Book.

    Well, now I have a caution about using an existing Seller Central account for Search Inside This Book. I'm no longer using my Seller Central account for selling anything, but when I tried to log in to it to access previous information from when I previously used that account to sell DVDs through Amazon's Marketplace, I couldn't reach the typical Seller Central page anymore, no matter how I tried. It would only default to the Search Inside This Book page, which is a specialized author/publisher-specific interface.

    Fortunately for me, this isn't disastrous, since it was a defunct seller account anyway, and I didn't badly need to get into those old files.

    BUT...beware if you use your Seller Central account for serious selling that you might want to contact Amazon in advance and ask what's best. I know that having two seller accounts is actually against Amazon rules and can lead to your being banned as a seller. But if Search Inside This Book really does make your Seller Central account inoperable as a seller account for selling on the Marketplace, then you would need a second one specifically for your publishing interests.

    So, there you have it. No real advice from here, but a counsel to seek out Amazon's take on the situation. Maybe there's a secret link to access your Seller Central information from the publisher page, or maybe it's something they'll fix in the future.

    8.31.2009

    Search inside the book on Amazon

    Now that I'm in the self-publishing world with my little personal book of poetry, I thought I'd share my experiences with Amazon.com's "Search Inside This Book" feature.

    Here's the gist of the feature from a reader's perspective, which is that it allows readers to search for keywords and — even more importantly, I think — view sample pages before deciding to purchase.

    From an author or publisher's perspective, that's golden. You get to entice potential readers with a few tempting pages from your tome, and those buyers will feel more confident about springing for a book online when they've had a chance to virtually thumb through the pages.

    Where the Wild Things Are -- Maurice SendakIf you want to try out the feature for yourself, go to any participating book on Amazon.com and click on any cover picture that reads "Click to LOOK INSIDE!"

    That appealing little icon will appear in small search results, as well, so readers will be able to see at a glance that your title is searchable. If they want to make sure your book deals with a particular topic, they can do a keyword search, as easy as searching a PDF.

    Here's a sample participating title for you to play around with: Where the Wild Things Are.

    If you click on the cover image, you can choose to look more closely at the front or back cover, flap, copyright page, or the first few pages. If you type in a keyword — "wild," say — you will see a paginated list of every instance of that word in the book, in summary form with the search term in bold.

    As an author, you might be concerned about security and who's going to buy the cow if you give away the milk for free and all that. By logging into an unused Amazon account of mine, I discovered that if you haven't bought something on Amazon they won't let you see beyond a certain amount of pages. Even if you are a trusted buyer, if you do a lot of a keyword searches, they'll let you see only a certain amount of pages per day. So the whole text of the book is scanned in and searchable (and an easily transferred candidate for Kindle), but readers do not have access to read or download the full book without paying for it.

    So, now that I've convinced you of the appeal of the program for published authors, I'll give you some hard infomation on how to sign up.

    You send in a PDF of either your entire book or separate PDFs of your front cover, back cover, spine, and interior. You must send in at least the front cover and interior, and you can leave out any sections of the interior that you wish, for instance if you're still concerned about security. However, that will mean that those portions of your book will not be keyword-searchable, which might affect reader interest in your book.

    Amazon was very accommodating and speedy in uploading and formatting the files. It was functioning within two days in my case. They will also deal with low-resolution files, though they prefer high DPI, and they can help crop or splice files as necessary.

    The sign-up is connected to your Seller Central account, so if you have a Seller Central account already, be sure to use your Seller Central email address to sign up for Search Inside This Book. If you don't have a Seller Central account, this process will open one for you. Don't worry too much about that; I mention it only because it was a little confusing and opaque to me. The interface for signing up is a series of email exchanges rather than a straightforward web format. That said, the time involved to get everything set up was not painful.

    So go offer your books for searching! It takes a few extra steps, but it's well worth it.

    5.20.2009

    Self-publishing your personal writing

    CreateSpace logoSpeaking of deadlines, one that's coming up fast is the June 1 deadline for NaNoWriMo winners to get your free bound copy of a book from CreateSpace.

    I mentioned before that I wasn't keen on the idea of self-publishing my NaNoWriMo novel, because I plan to submit it for traditional publishing. But, for any writer, there is probably always some art form that was done more for personal pleasure than for publication glory, and a print-on-demand press is the ideal platform for preserving that art for future generations. Even if you're not a NaNoWriMo winner, read on, for I have good news on that front!

    In the interests of scrambling, I am compiling 20 years (golly, I'm old) of my poetry into a chapbook for the purpose. I'm laying it out in Microsoft Word, having my graphic design-adept husband craft a cover, and calling it a day.

    Of course, first I had to dig out boxes from storage to find some older poems that weren't still (or ever) digitally entered on my computer. I chose a little over 130 poems to be in the book (why not go whole hog, when I'm not sure I'll do this again?), most of them recent, but a sampling from my teenage years. And then I had to figure out how to organize them all.

    I threw out chronologically. Do I start with the early (read "bad") poems, so that's the first thing people see when they crack it open? Or do I go reverse chronologically and have the clunkiest poems be the last thing left in people's minds?

    No, no, I needed some other arrangement. I considered grouping themes (school, parenting, nature, etc.), or structures (formal vs. informal, or even subdivided such as, sonnets together, sestinas here, etc.). But it seemed like it would be too repetitious for the reader.

    Reflections on the Journey — Courtney CyrIt finally came to me. A friend had recently crafted a beautiful self-published book of poetry and photography (see thumbnail to side). Because her photos are primarily macro nature shots, she wisely grouped her poems and pictures into a coherent seasonal progression.

    I'm all about stealing what works, so I started making piles. Some poems were easy to sort: a poem with "July" in the title went in the summer stack, and a poem about the start of school went in autumn. Others were more metaphorical — poems of grief made it into winter, and hope for rebirth into spring. A few were more nebulous still. If the poem was mostly happy but not sentimental: That sounded summery to me. Did I sound pensive but not depressed? Fall, I think.

    Eventually, I had four roughly equal stacks, and then it was time to make sure that the poems made a nice progression within each season, and leading from one season to the next. So, for instance, the autumn section would end with a poem suggesting colder days ahead. Again, some of this was bordering on esoteric, but it all seemed to work out.

    For the week ahead, I'm editing and fine-tuning the layout. And then off my book goes to be printed! My very own proof copy of my very own poetry, on the page in black and white.

    I chose to self-publish my poetry because I could submit it for publication, but I just don't want to. I write it because it begs to be written, not for a specific audience, and certainly not a commercial one. Unlike with my fiction! My novels also beg to be written, but I love having an audience in mind, and I don't at all mind revising my fiction to make it more sellable.

    So, now for the good news — in perusing CreateSpace's site to determine the nitty-gritty of cost, shipping and handling, and royalty setups, I was pleasantly surprised that the prices for self-published black-and-white books are really astonishingly reasonable. And, they get you an ISBN and listed on Amazon.com automatically. And, because it's print-on-demand publishing, they print up a copy as soon as someone orders it, so there's no need to order a big print run, then store all the inventory and try to sell them all off.

    I had been intending just to take my proof copy and run, but it's sorely tempting (and, yes, cleary that was CreateSpace's clever intention!) to buy several copies of my cute little chapbook to hand out to family and friends this Christmas. (Nothing says "I love you" like a vanity press offering!)

    I also realized I could offer my collected poetry for sale on my personal writing blog, in case other friends wanted to pony up the bucks necessary to purchase it. If they buy it through Amazon.com, they can even qualify for free Super Saver Shipping. And I can price my paperback reasonably low, while still making a little bit in royalties!

    So, even if you're not a NaNoWriMo winner, check out CreateSpace and see if it's a good fit for any of your unpublished works. Getting your own proof copy requires you to pay only the base publishing price plus shipping and handling, and the same goes for any copies you buy for yourself.

    So, think about the gems you have languishing in a drawer: a stack of short stories? A fabulous how-to on creating wool diaper covers? You can also self-publish (is that the right term here?) movies and music, so if you have a CD of children's lullabies you've been dying to have professionally produced to give to your kids as a Christmas present (been there, done that), that's also an option.

    I'll try to write once I receive my proof copy with an update on quality, turnaround time, and final bill. Happy self-publishing!

    1.28.2009

    How not to respond to readers

    This is hilarious:

    Dear Author: Top Ten Things Authors Should Not Do at Amazon

    It reports on a flame war between an author and her reviewers on Amazon.com.

    Note: Do not be this author.

    7.07.2008

    Give readers a taste

    I was writing an article for a friend's magazine about parenting books I've found helpful, and I realized that I'd come to almost all of the books on my list through online resources. It reminded me of Jo Beverley's plug of Google Book Search, and my note that current books are also wonderful to have in full or in excerpted form online.

    I think sometimes authors try so hard to "protect" their work — their ideas and their copyright — that they forget that the point is to get their writing out there. For some, it might be selling more books; for others, the message might be paramount. Either way, it's best to reach the widest audience possible.

    I wouldn't have read 95% (I'm guessing here) of the books on my list if I hadn't been able to come to them in some way online first. Whether it was reading detailed reviews or blog entries, looking at excerpts online, downloading articles from the same author, discussing the ideas on forums, or whatever avenue, I needed frequent exposure to the book and author in question before I was intrigued enough to seek out and read the book for myself.

    If you're an author or self-publisher, what does this mean for us?

    Here are some suggestions for the online world of marketing:
    • √ send out review copies whenever they're requested
    • √ start a blog to talk about and get readers interested in your work and ideas
    • √ host contests and polls to generate excitement, such as a vote on cover art or a character's name
    • √ hold drawings to award copies of your books to lucky readers
    • √ offer live chats with readers
    • √ start a fan email list and send out occasional newsletters
    • √ post short stories, articles, or sample chapters on your website
    • √ allow and encourage others to link to your work
    • √ visit other appropriate blogs and leave helpful comments with a link back to your site
    • √ check out Google AdWords for targeted pay-per-click ads
    • √ join and post on online message boards and create a tasteful signature that links back to your site

    If anyone has other good online-marketing ideas, let me know and I'll add them to the list.
    Related Posts Plugin for WordPress, Blogger...