
Even though there's no built-in way to create footnotes in Blogger, it's easy enough to code linked footnotes into a post in HTML view. Here's how I do it.
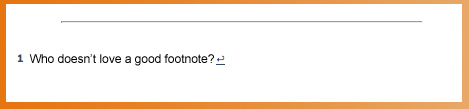
What it looks like for readers

When readers click on the footnote number, it jumps them down to the footnote. Clicking an arrow after the footnote conveniently jumps them back up to where they left off.
Footnotes are a great solution for tangential or additional text, such as caveats, resource citations, or pointless jokes. (I especially prefer the latter.) Readers can choose whether to continue reading the main text, or be delightfully distracted down to your bonus offerings, and then back up again when they're ready to resume.
The HTML code for you
You must enter this code in "Edit HTML" view in Blogger. (I have a tutorial explaining the difference between Edit HTML and Compose if you're not familiar with the two.)WARNING: NEVER switch back to Compose view once you've inserted the footnote code in Edit HTML!
Code to put in the text where you want the footnote's number to appear:
<a href="#1" name="top1"><sup>1</sup></a>
All right, which is easier for you? I pasted it above so you can see it easily, but here's the same code in a grab box for easier copying/pasting. Take your pick!
Code to place at the bottom of your post:
<hr width="80%">
<p>
<span class="Apple-style-span" style="font-size: x-small;">
<a name="1"><b>1 </b></a>FOOTNOTE<a href="#top1"><sup>↩</sup></a>
</span>
Obviously, replace "FOOTNOTE" with the actual footnote!
Explanation of the codes
These footnotes work through a simplistic process of "name" URLs that reference each other. You tag each part of the footnote with a name. The footnote number in the text is named "top1," and the footnote number at the bottom of the post is named "1."Then the paired URLs send readers back and forth between these "names" through the href codes. Telling the URL to go to href="#1" sends it to the post's URL but with #1 appended. That # sign tells the code to look for a name that matches what's after the #, and it finds it in our footnote named "1."
Multiple footnotes
If you want multiple footnotes, you simply need to paste the following parts of the codes again, substituting the numbers you need for the word "NUMBER."Code to put in the text where you want another footnote's number to appear:
<a href="#NUMBER" name="topNUMBER"><sup>NUMBER</sup></a>
That's three replacements at the top, if you're counting.
Code to place at the bottom of your post for multiple footnotes:
You want to add in this line after your first footnote line as many times as you need it.
<a name="NUMBER"><b>NUMBER </b></a>FOOTNOTE<a href="#topNUMBER"><sup>↩</sup></a>
Again, replace the three instances of "NUMBER" with the number you're on.
Here's a grab code for 5 footnotes:
Styling your footnotes
Obviously, you can feel free to alter these codes cosmetically to suit your blog. This is just what I came up with. The basic structure is the "name" links, and the rest is decoration.I used a "sup" command to make the footnote numbers superscript in the text, added an "hr" line at the bottom to separate the footnotes from the post's text, made the footnote font "x-small" in size, and used a little superscripted ↩ symbol for returning to the text location. Any of those elements could be changed as you wish. For instance, you could have your footnotes appear in a different font face or color, or change how you separate off your footnote area. If you want to copy mine as is, I don't mind, though I'd love any shout-outs to this post you'd care to give!


